In this blog we are going to explain why we are creating expense transaction and how to create an expense type transaction from POS. Many retailers use this expense transaction when they use their cash drawer amount for store related purchase for e.g. like purchasing printer ink cartridge, paying electricity bill etc.
When we create an expense transaction from POS it will record the money that is removed from the cash drawer and if required the reason for the expense can be noted on the transaction comment. This expense transaction can also be performed from the welcome screen, Transaction screen and Button grids. Dynamics 365 MPOS would also allow operator to perform expense transaction in offline mode too.
Let’s see how this can be configured in dynamics 365 finance and operations.
Link the expense account against the appropriate store
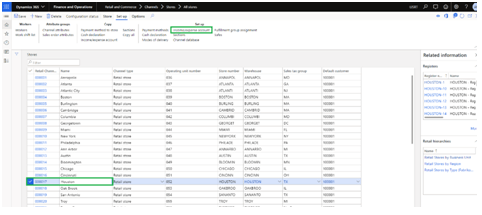
- Navigate to Retail and Commerce > Channels > Stores > All Stores.
- Select the desire store where you would like to configure the “Expense Account”.
- Click on the “Set up” tab > Income/Expense Accounts.
![D365 Retail POS]()
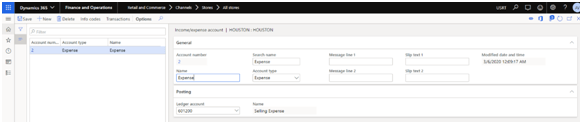
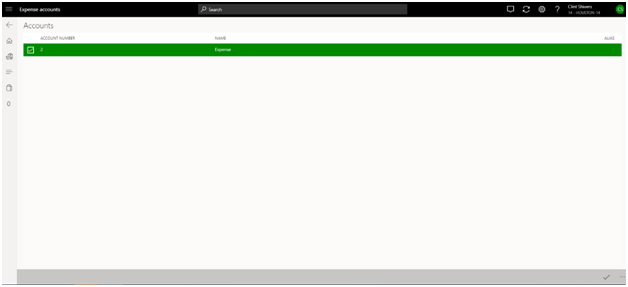
- Click New and create a new expense account.
- Enter the Account Number e.g. 2
- Define the Account type as “Expense”.
- Select the posting ledger account from the ledger account drop down e.g. “601200-Selling Expense”.
- In the name and search name text box enter the name “Expense”.
- Click Save.
![D365 Retail POS]()
Add Expense Account against the Button grid
Navigate to Retail and Commerce > Channel setup > POS setup > POS > Screen layouts.
Select the appropriate screen layout which is linked against the store/register/worker.
Note – I have configured screen layout F3CSH against the store/register/worker.
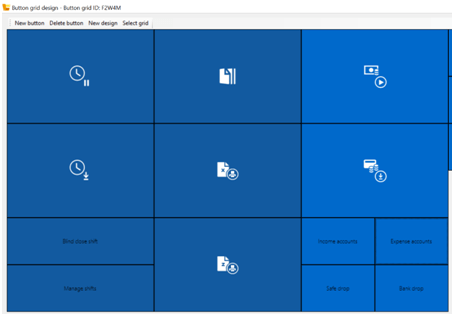
Select the appropriate Layout size and Button grid.
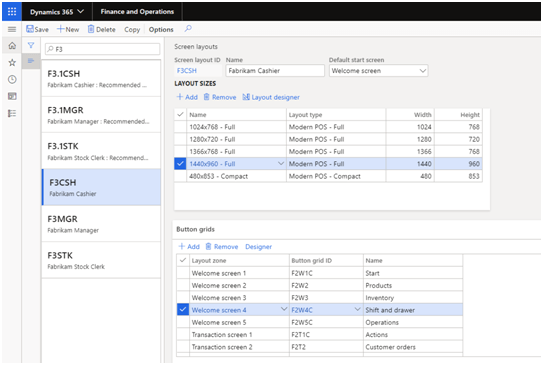
Download the Shift and Drawer designer button grid.
Add a new button and configure the Expense Account in the action tab.
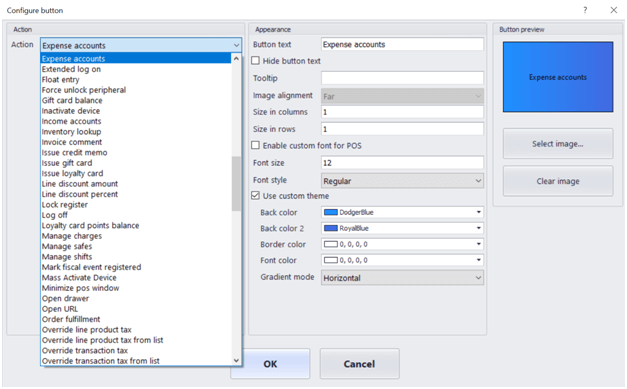
Click Ok
Expense account button will be added on the button grid.
Distribution Schedule
Once the above configuration is done.
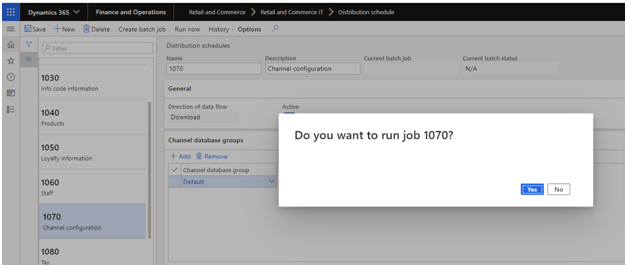
Navigate to Retail and Commerce > Retail and Commerce IT > Distribution schedule
Execute the job 1070 – Channel Configuration and 1090 – Register
Once the job gets applied that changes will be synchronized at POS.
Create an expense transaction at POS
Login to POS.
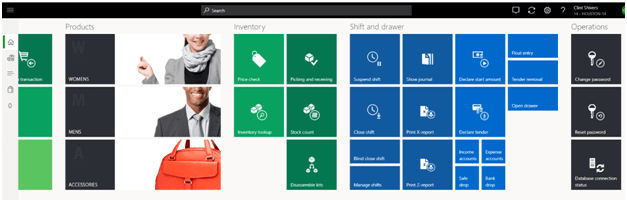
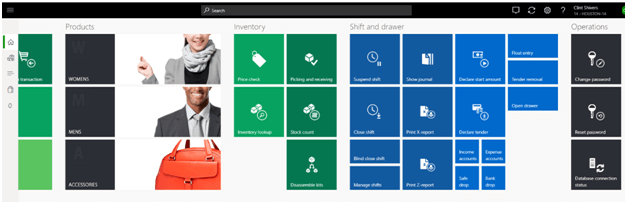
Click on the Expense account button.
Select the account number.
Enter the amount
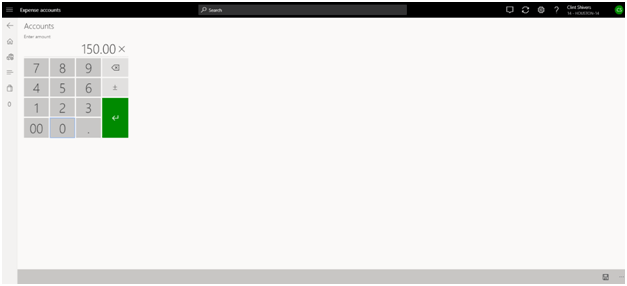
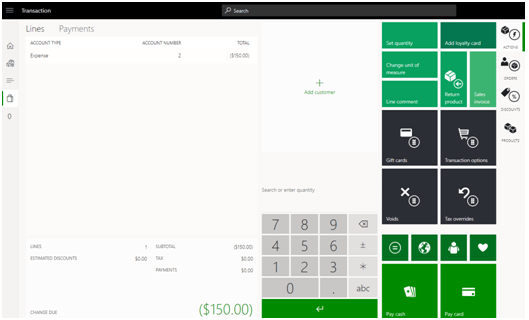
Expense amount will be added to transaction line.
Click pay cash and complete the transaction.
Once transaction is complete. Click on Show Journal underneath Shift and drawer button grid.
In the show journal screen the transaction type will be displayed as Income/Expense.

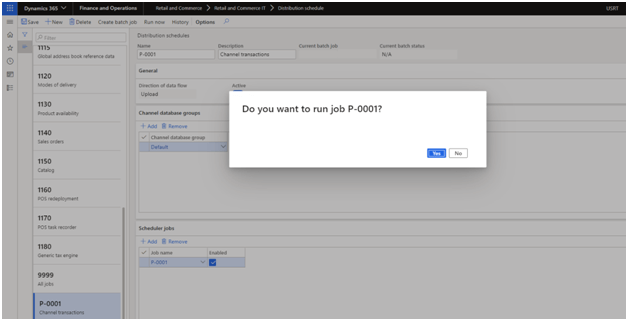
Distribution Schedule
Once the transaction is completed.
Navigate to Retail and Commerce > Retail and Commerce IT > Distribution schedule
Execute the P-Job.
Once the job gets applied that changes from POS will be synchronized to D365.
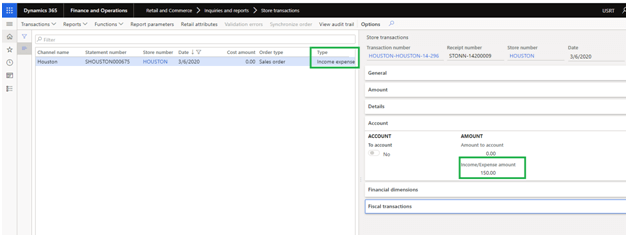
Retail Store Transaction Table
Navigate to Retail and Commerce > Inquiries and reports > Store transactions.
Filter the transaction using date / receipt number.
In the form you can see the transaction type = Income expense with amount 150.
Retail Statement Creation and Posting
- Navigate to Retail and Commerce > Channels > Stores > Retail Statements.
- Click New Statement.
- Select the desired store from the drop down “Houston”.
- Calculate the statement based on the date and time interval.
- In the lines grid you can see the expense transaction amount is captured.

- Click Post statement.
- Posted Statement can be seen in the below path.
- Navigate to Retail and Commerce > Inquiries and Reports > Posted Statements
If you get any more information and doubt then you can ask our Dynamics 365 experts straight away.


