In this tutorial, we will be learning as how to create ASP.NET Core 2.0 application with Angular and to deploy the application on Microsoft Public Cloud i.e. Microsoft Azure, using Microsoft Visual Studio 2017 v15.3
For novice Angular / Cloud developers, aspiring .NET / Cloud architects, and all other IT professionals associated with the .NET Core framework & Cloud computing, especially with Microsoft Azure, this tutorial will explain the importance and capabilities of newly released NET Core 2.0 framework.
Quick Overview
.NET Core 2.0 is all about making things easier. It just made simpler to get started with developing web apps along with building great rich UI. Angular Template are now only supported by .NET Core 2.0 or higher (all depends upon the feedback of developers) and Visual Studio 2017 v 15.3 or later only.
Prerequisites
For accomplishing above task, we need below set up as requirement,
- For creating a web app, we need Microsoft Azure Account. If you don’t have one, create your free trial account by clicking here.
- Visual Studio 2017 v15.3 (as of writing, it’s in preview). Download Visual Studio 2017 v15.3.
- .NET Core 2.0 – Download .NET Core 2.0
- Node.js – Download Node.js ( Better to have, though optional, as it helps in compile run for TypeScript file to get them into JavaScript file )
Getting started with Angular
Angular is one of the most in-fame JavaScript frameworks based on Object-Oriented web development techniques used by web designers (developers) around the globe. Companies hire dedicated net developers to make smart web applications.
Click here to learn more about Angular.
ASP.NET Core 2.0 provides template for building application with Angular.
Let’s start,
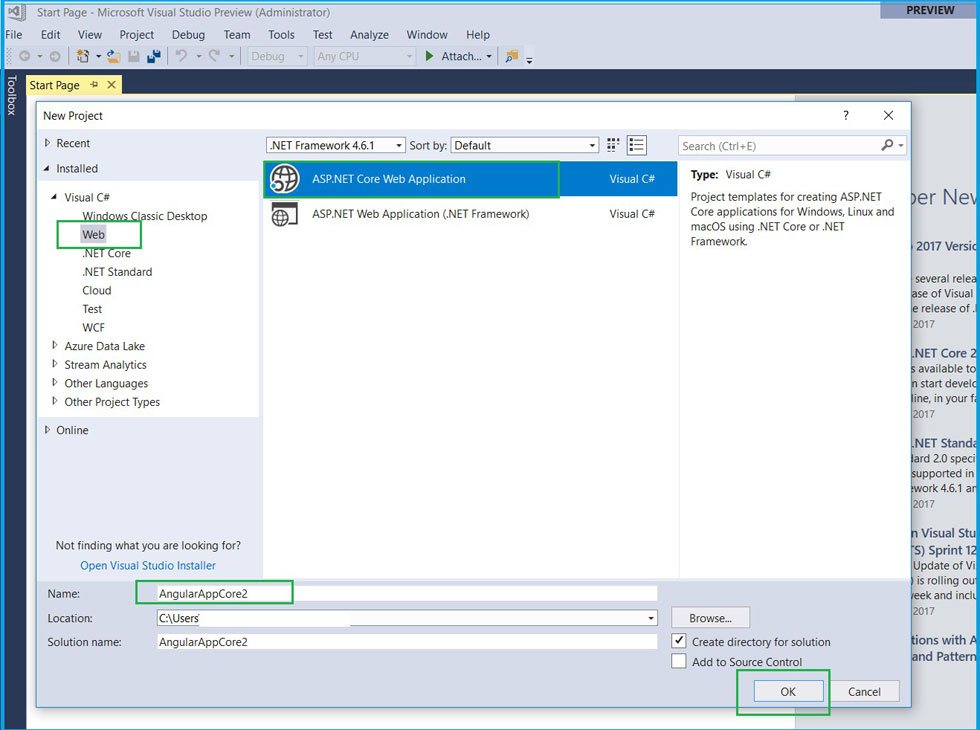
Open Microsoft Visual Studio and select Web => ASP.NET Core Web Application. Give some valid name for the application. Here we have given application name as, ‘AngularAppCore2’. Click OK to move ahead with next template selection screen.
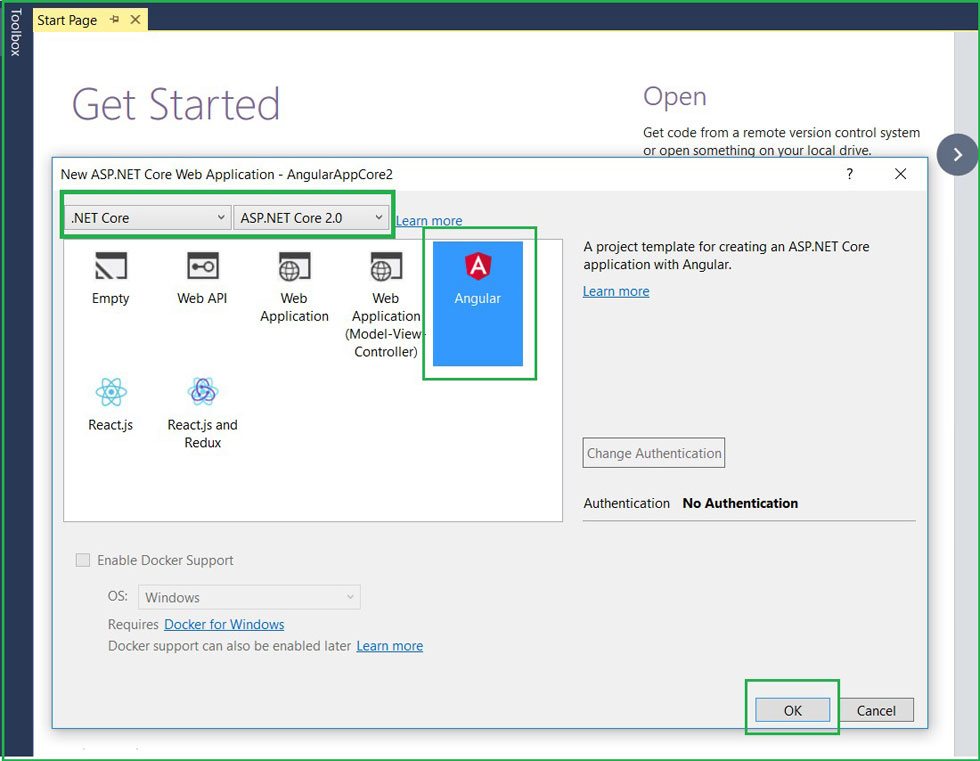
As you can see in below image, .NET Core 2.0 has come up with new templates
For creating application with Angular, select ’Angular’ template. This template builds up Angular application ready for development.
Make sure, you select ‘’ASP.NET 2.0’ from dropdown available to choose framework. Though if you choses any lower version, this newly added application, frameworks templates options would no longer be available.
For keeping this article simpler, let the authentication as ‘No Authentication, with ‘Enable Docker Support’ checkbox, unchecked.
Once done with selecting framework and template, click OK.
This will create an ASP.NET web application with Angular.
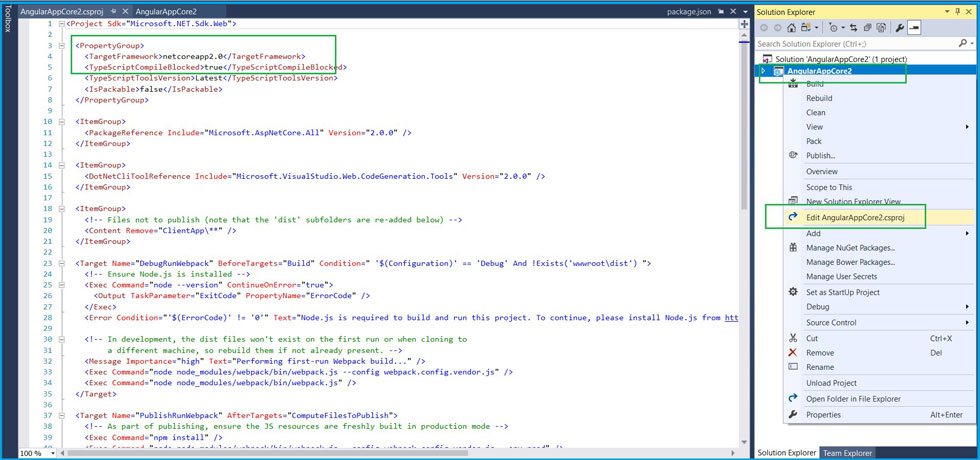
In Solution Explorer, right click on Project => select Edit .csproj option.
Notice it has only one package, with one version! We don’t need any other packages. This single package bring in all of ASP.NET Core into this application. Also, it includes all necessary configurations like node.js, npm making application run with Angular hassle free.
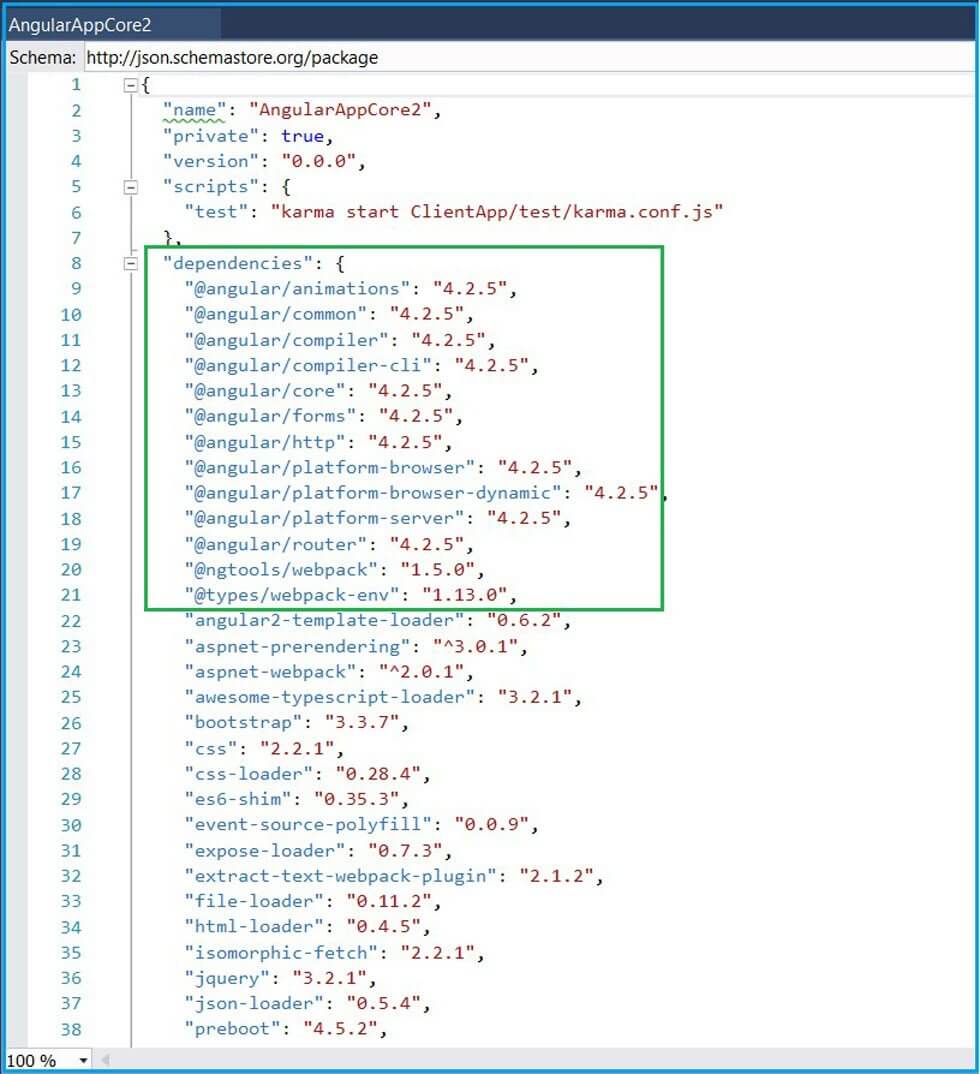
Also notice, it includes all required dependencies libraries with respect to Angular.
So we need not have to make any installation or run any pre-installation steps, as we used to do earlier while developing Angular application. ASP.NET Core 2.0 framework, sets all required configuration with newly added Angular template, making it fast to get started in real time.
By default it’s Angular 2.0
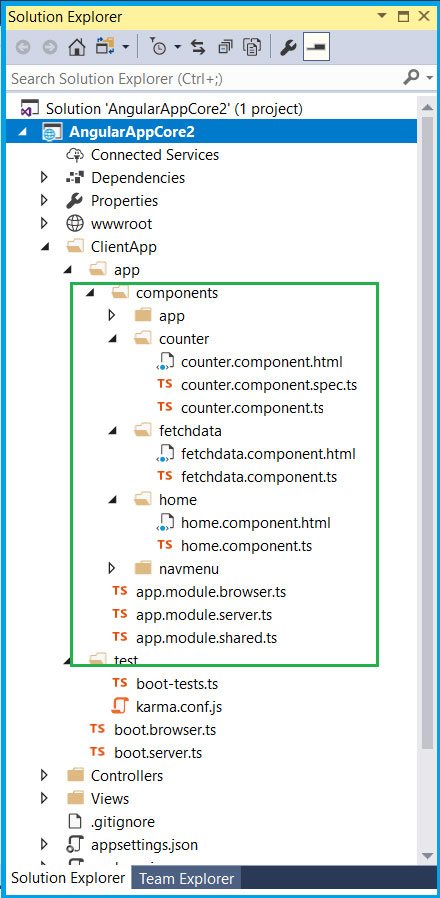
Below is the project structure:
By default project consist of three components naming Home, Counter and Fetch Data.
- Home component provides code with plain model binding View to display static data.
- Counter component provides code implementing counter logic and binding its results to view. This sample can be used for implementing any business logic as required.
- Fetch Data component provides code implementing calling an API, and then binding it response to model call, for displaying result in View. This sample can be used for calling any RESTful APIs in to application.
It comes up with a very clean and define structure, placing all related TypeScript file with .ts extension and html file specific to each component under separate folder.
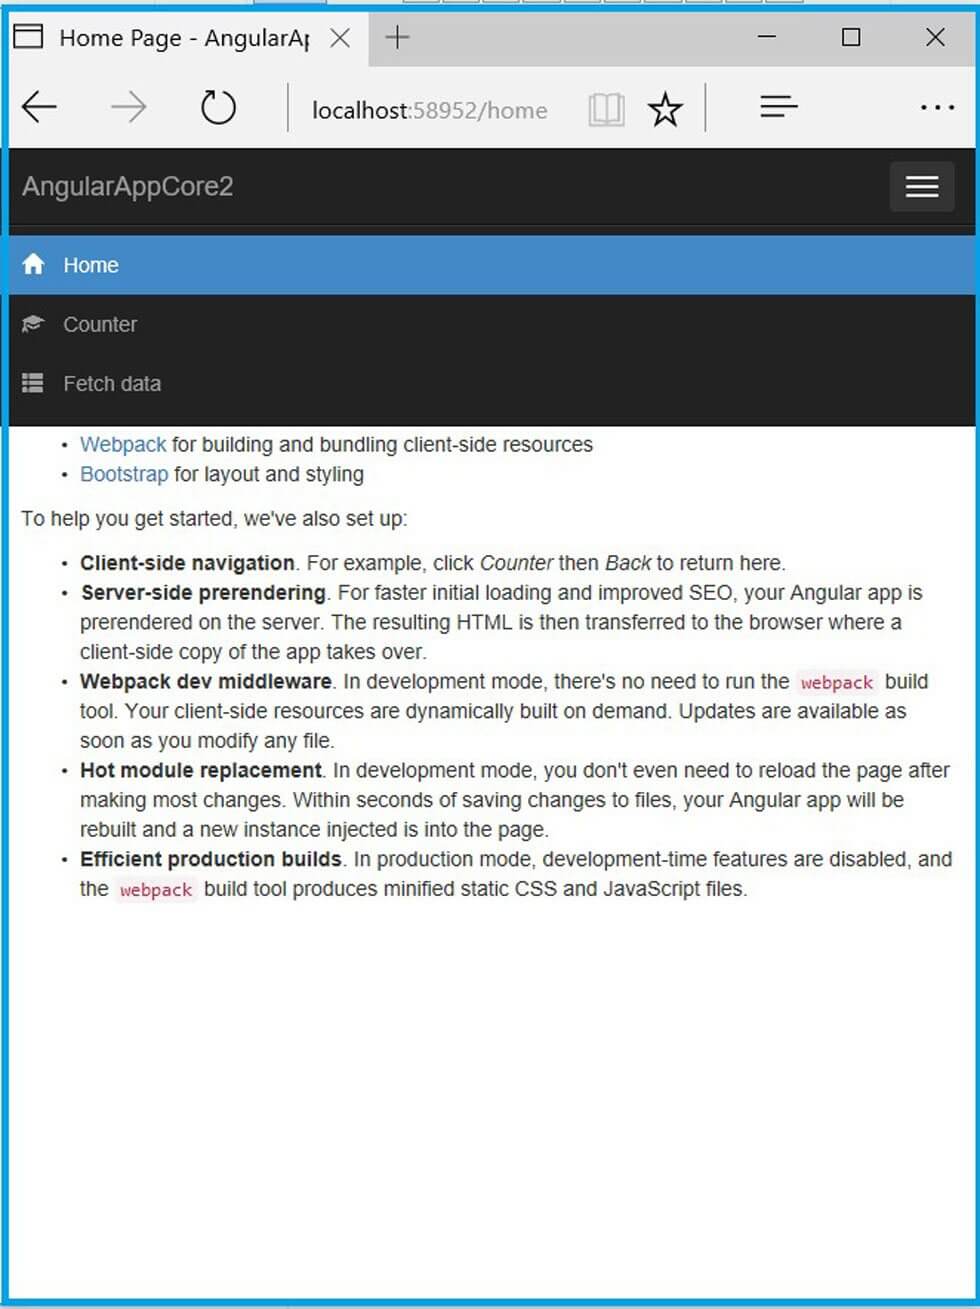
Let’s build & Run the application by clicking CNTRL + F5.
Great! it works fine, with a responsive display.
Deploying to Azure Web Apps
Now let’s deploy this ASP.Net application with Angular to Microsoft public Cloud i.e. Microsoft Azure Web Apps.
There are multiple ways of deploying application to Azure web apps, like, through Azure web portal, Azure CLI and Repository Stacks. Along with this listinged items, we can also deploy application using Visual Studio.
As mentioned above, we will be using Visual Studio 2017 v15.3 for performing deployment. Follow below steps,
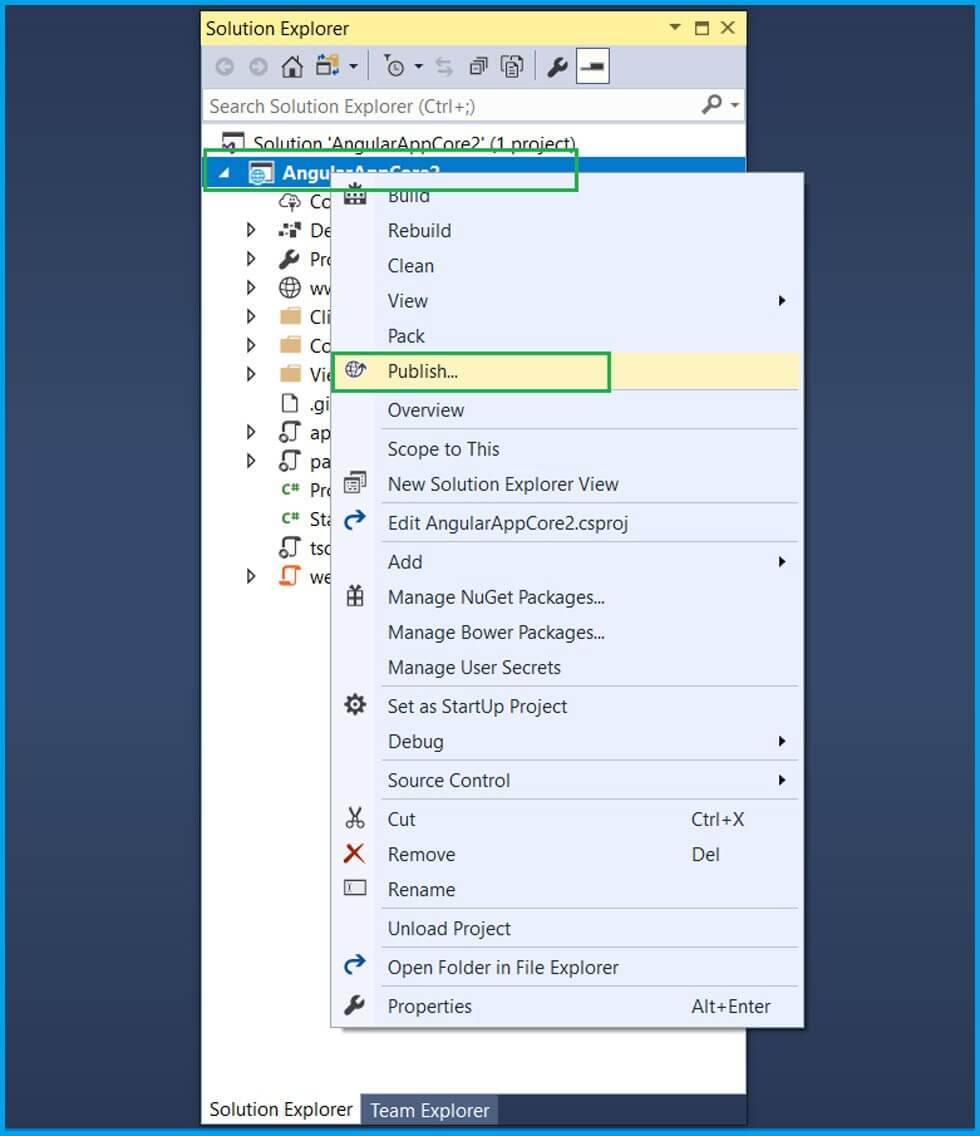
In Solution Explorer, right click on project and click on ‘Publish’, as shown below,
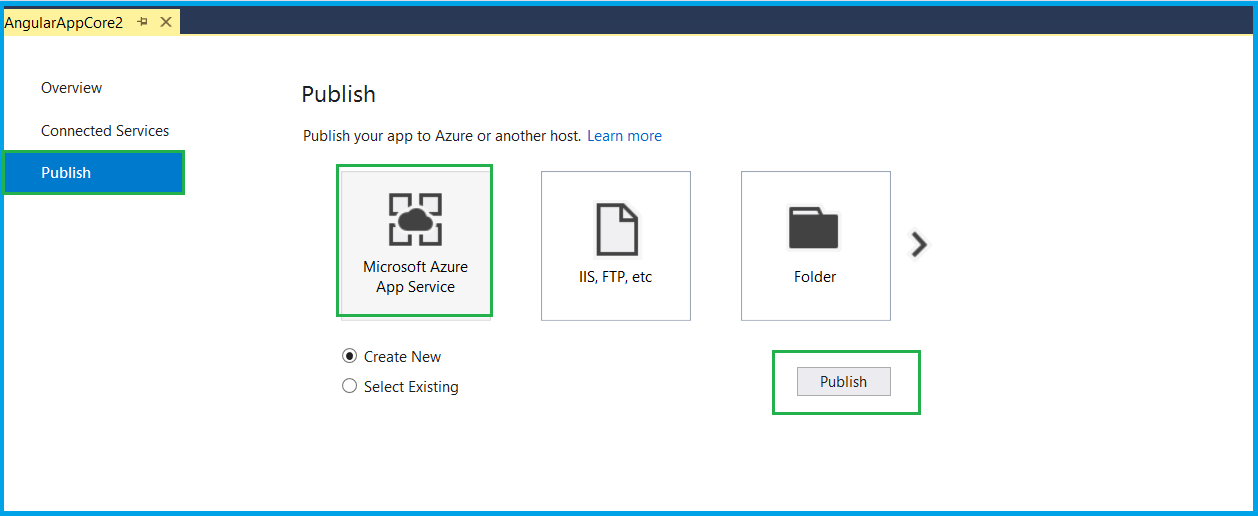
Clicking on, ‘Publish’ will open up below window. We will be using ‘Web Deploy’ deployment method. As we are pushing this application for the first time, Select ‘Microsoft Azure App Service’, selecting ‘Create New’ option and click ‘Publish’ as highlighted below.
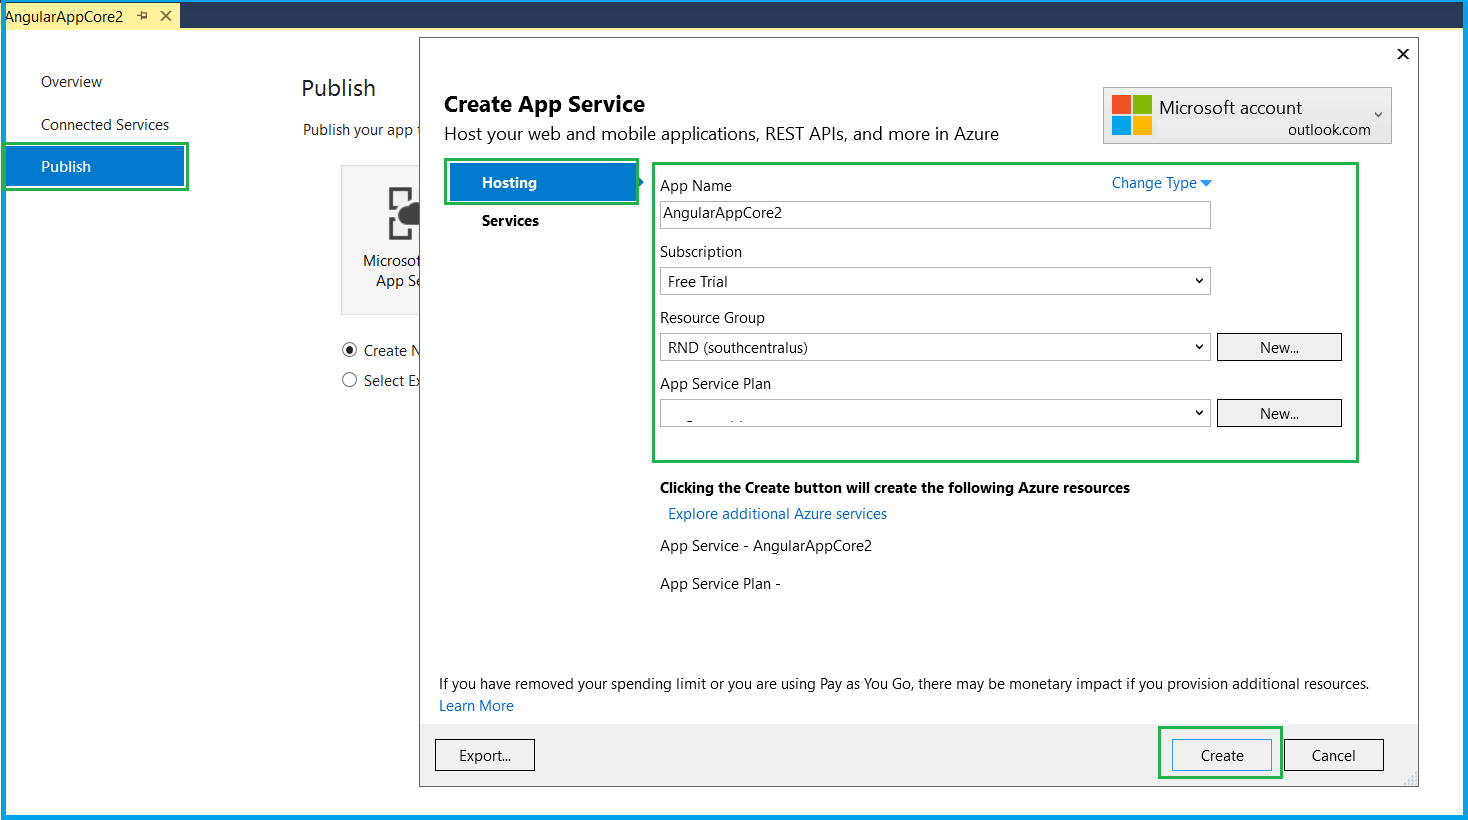
Now, this part is most important in this entire process. Here, we will be creating new Azure Web App for deploying application.
It has the following details,
App Name- Enter a Unique name for your application. This name is unique across Azure. As part of this article, I have entered ‘AngularAppcore2’ Subscription – Your Azure subscription.
Resource Group- Group of related products / service created on Azure Portal. You can select existing resource group or create new. Here I have created resource group with name ‘RND’, App Service Plan- You can select an existing App Service Plan or create new.
Tab name ‘Services’, recommends with other related Azure services may require for application, like SQL Database. In this tutorial, we are not using any Database.
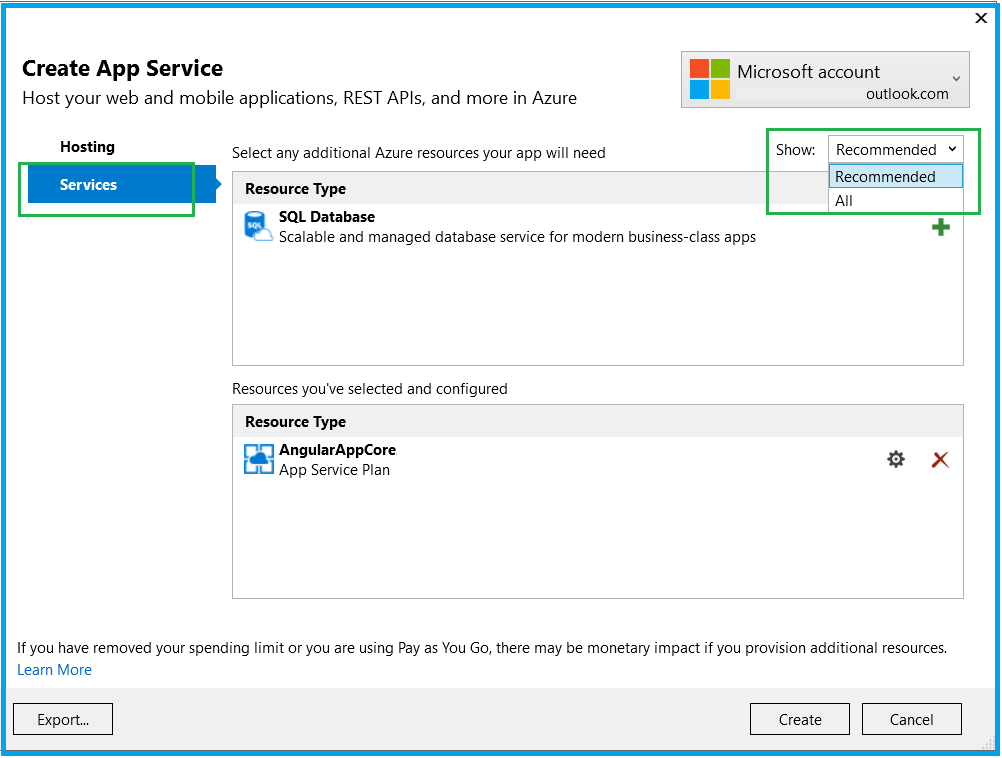
Enter the details and click ‘Create’. This will create an Azure Web App with the submitted details. This could take several seconds to get on to the next screen.

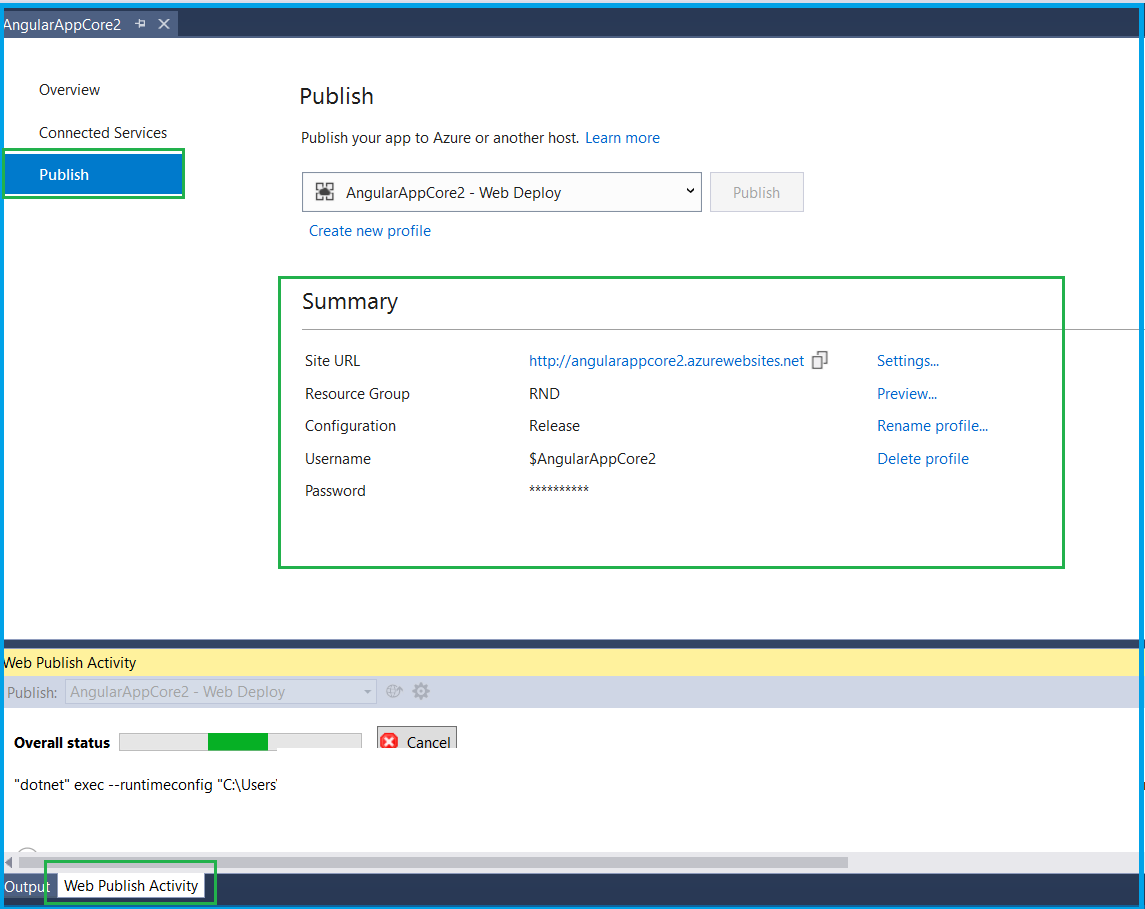
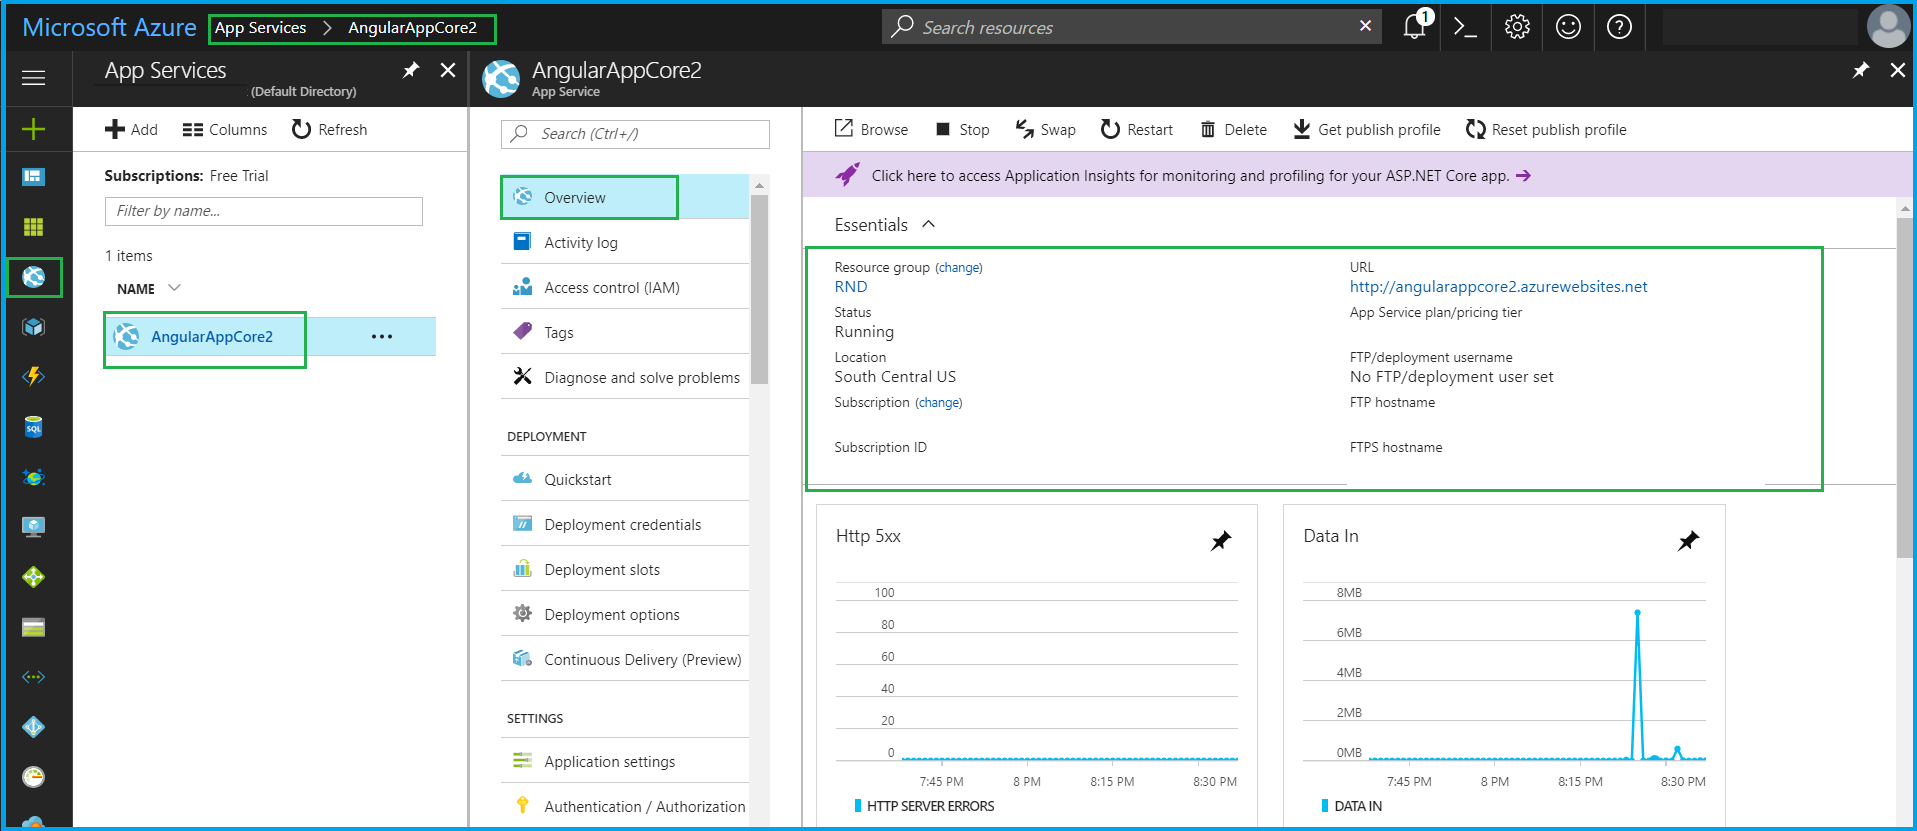
This screen mentions important though few details of Azure web app.
- ‘AngularAppcore2 – Web Deploy’, application name with deployment method selected.
- Summary with Site URL. This will be our public cloud URL for accessing application. This forms as ‘ app-name’.azurewebsites.net
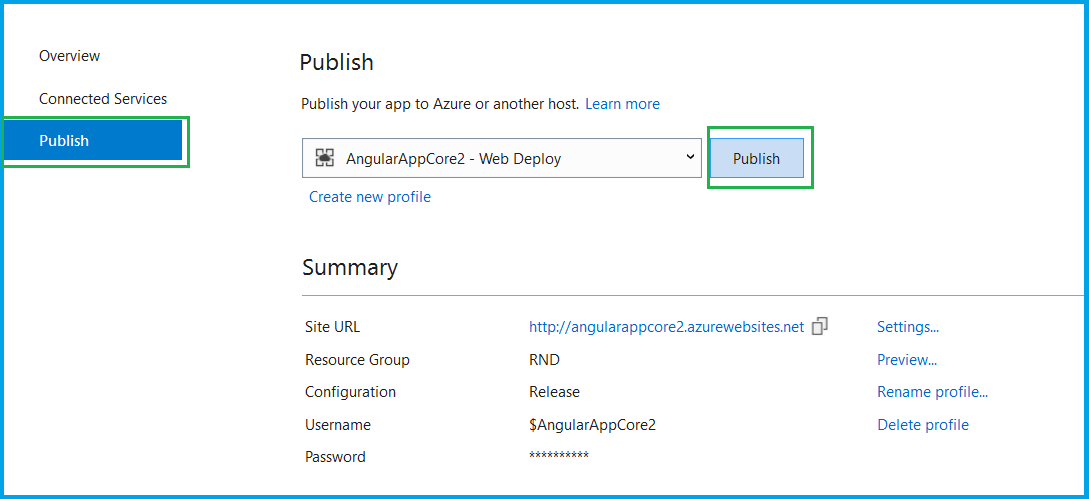
Screen allows you to perform multiple activities with Azure Web App profile like,
- Renaming profile name, ( note you can’t change Web app name)
- Deleting app profile.
- Preview files details being modified. This usually come in picture during next round of deployment.
You can see the progress of deployment along with details under ‘Web Publish Activity’ window part of Visual Studio
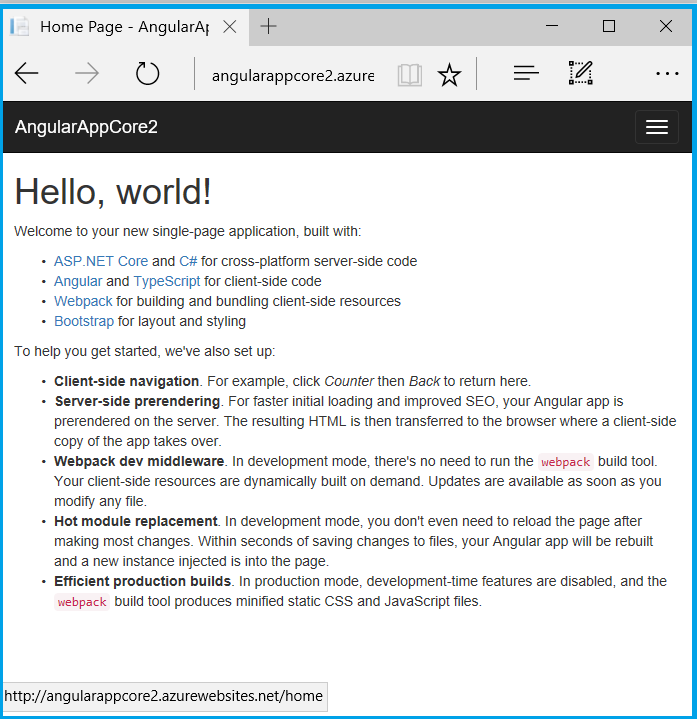
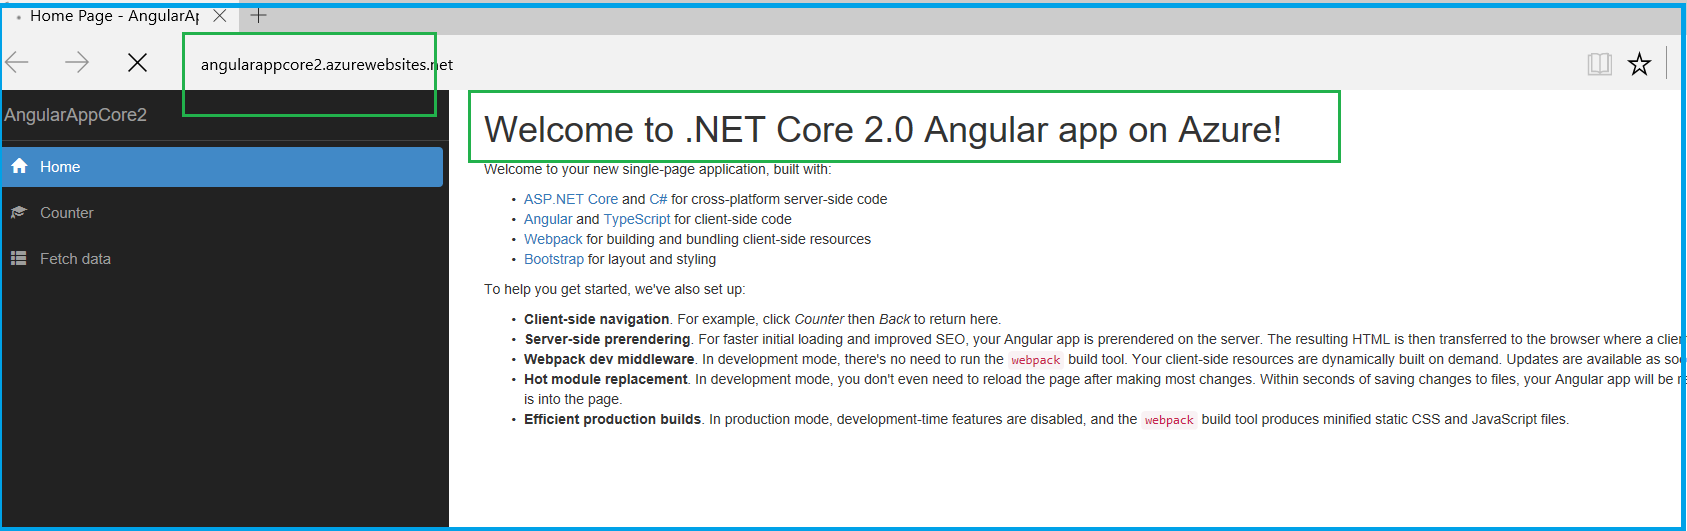
Once publishing succeeds, it will open the browser with our web application running.

Great! Our ASP.NET Core 2.0 application with Angular is now live on Azure Cloud! Notice the Web URL, as mentioned above.
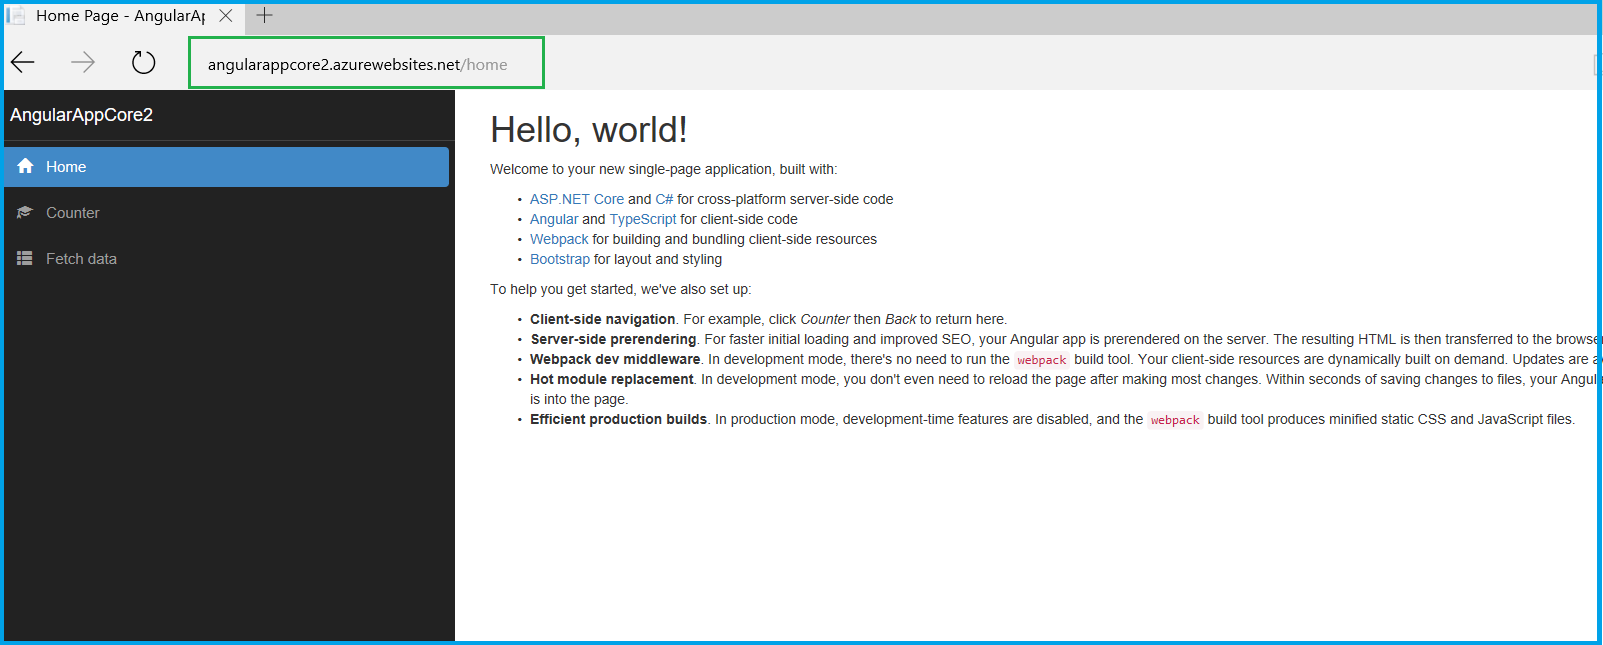
With Responsive fashion as mentioned above,
Verify on Azure Portal
Go to Azure portal, http://portal.azure.com/
Click on ‘App Services’ option.
We can see our newly created Web App been listinged.
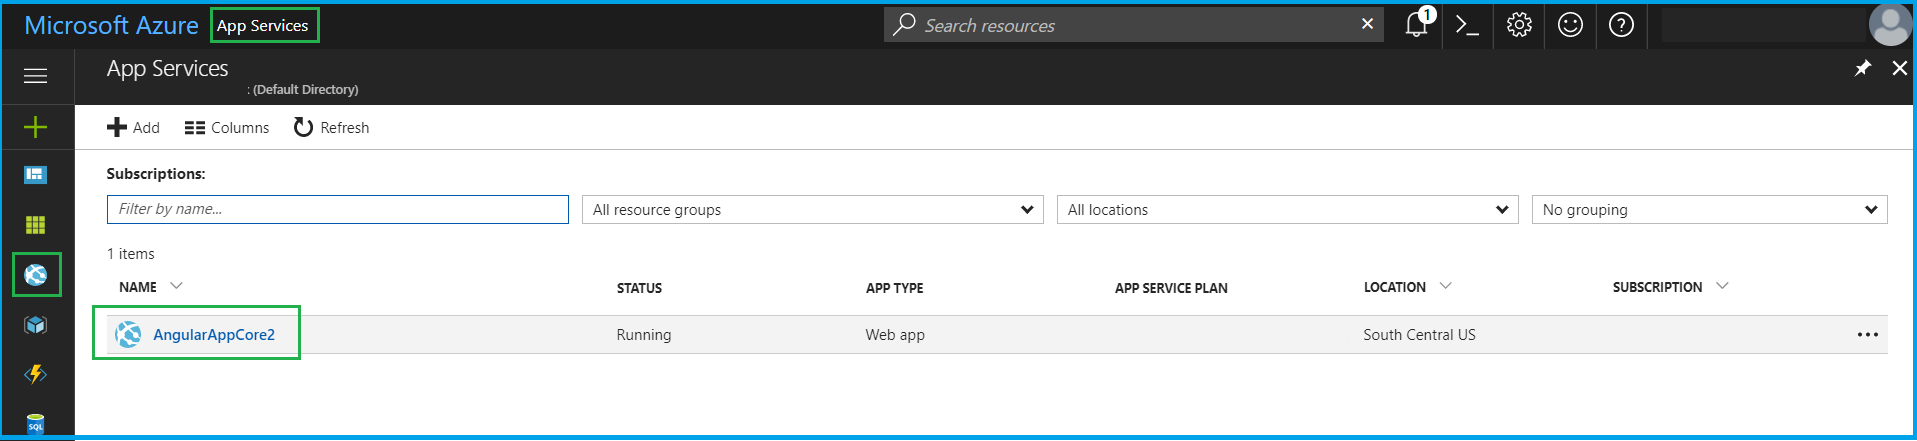
Click on Web App name
So we have successfully created Azure web app using Visual Studio 2017 v15.3
Modifying & Redeploying
Now, let’s modify our application.
With interest to our article, will make small text changes in Home view heading text, as shown below. So as once redeployed, we can notice this change made.

Save the changes, open Solution Explorer = > Right click on project => Click on ‘Publish’ Below window will be open up, with earlier details. We can review the details of files where the changes were done, on clicking ‘Preview’ option (Though it’s optional as we made minor change.)
Now the only this we need to do is,
Click on ‘Publish’ button.
Once publishing succeeds, it will open the browser with our web application running with changes being made, Check below image, updated text is now live!
So we learned how creating ASP.NET Core 2.0 Application Development with Angular and deploying it to Azure Web Apps using Visual Studio 2017 v15.3 is a much simpler task. Also, modifying the application and re-deploying it to Azure was accomplished in minimal efforts.
ASP.NET Core 2.0 framework release has practically made getting started activity with Angular, easier for developers,

Recent Blogs
Categories


