Agenda
In this article, we will create an ASP.NET Core 3.1 Web app that acts like a chat application. All the connected clients will be notified when a new message comes in the queue. We will use this using the following technologies:
- .NET Core 3.1
- SignalR
- ASP.NET Razor pages
We will not dive into the basics, so ASP.NET developers have prior knowledge of .NET Core application architecture is needed.
Tools:
- Visual Studio Code
- .NET Core 3.1 SDK
Let’s start
Step 1: Install Visual Studio Code from https://code.visualstudio.com
Step 2: Install .NET Core 3.1 SDK from https://dotnet.microsoft.com/download/dotnet-core/3.1.
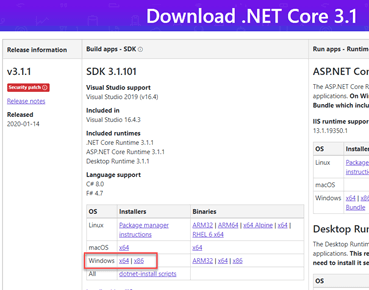
Note: Download the correct installer based on the architecture of your computer.
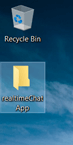
Step 3: Create a folder at the location where you want to save the source code of your chat application. I created on my desktop.
Step 4: Open Visual Studio Code and open this folder.
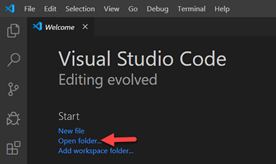
Step 5: Open Integrated terminal.
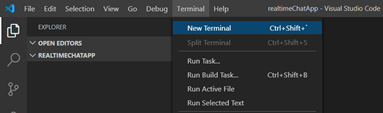
Step 6: We will be using .NET Core CLI to create the new web application and install the required libraries. So, let’s first develop a Asp.NET Core Web application and copy the below command to the terminal and press Enter.
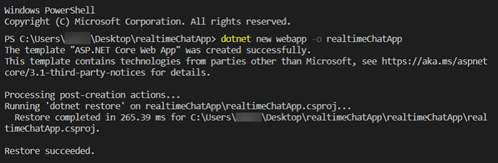
Step 7: Now, hit the following command to move your terminal active directory to the project directory

Step 8: We will use a new tool known as “Libman” or Library manager. It is a Client-side content manager tool for web apps. To learn more about it, you can follow the following article.
https://devblogs.microsoft.com/aspnet/library-manager-client-side-content-manager-for-web-apps/
Step 9: Install Libman in your project directory. Hit the following command in the terminal.

Note: The above screenshot shows an error because for the purpose of this demo, I already installed this on my system. When you install on your system, this command will install this tool at the Global level.
Step 10: Install signalR library using Libman in your project directory. Please hit the below command in terminal.
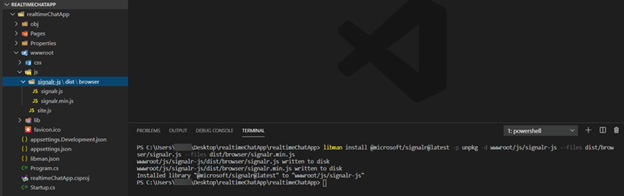
In the screenshot above, you can see that once I hit the command, on the left pane, a Libman.json file is created. Also, the path that I mentioned is automatically created in wwwroot folder and corresponding files are copied there. This is the flexibility that we get with Libman.
Now, we are done with all the setup. Let’s code.
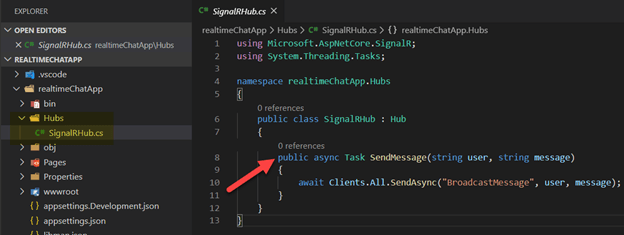
Step 11: At the very first, we need to create a SignalR hub that will create a persistent connection between the client and the server.
Create a folder named “Hubs” and create a new file with name “SignalRHub.cs”. Replace the code with the following code in the file.
In the above code, we are inheriting from “Hub” class which is a part of .NET Core SignalR library. This will make persistent connections.
Final Code should look like this with the same folder structure as shown.
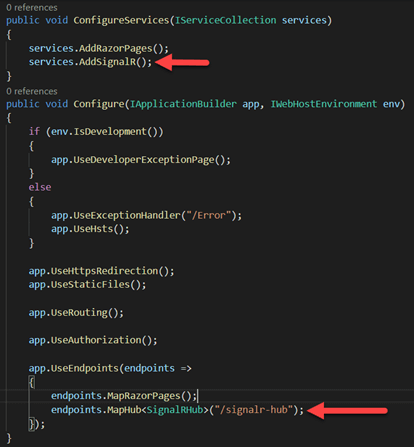
Step 12: Since we have created the Hub, we need to refer this hub in the Startup.cs file so that when the application runs, it starts the SignalR connection to this hub and our client code can subscribe to it.
Open Startup.cs file and make the following highlighted changes.
Now, we have successfully configured the server code. We need a client page, that can send and receive messages from this Hub. We will achieve this with the signalR.js library that we installed with Libman.
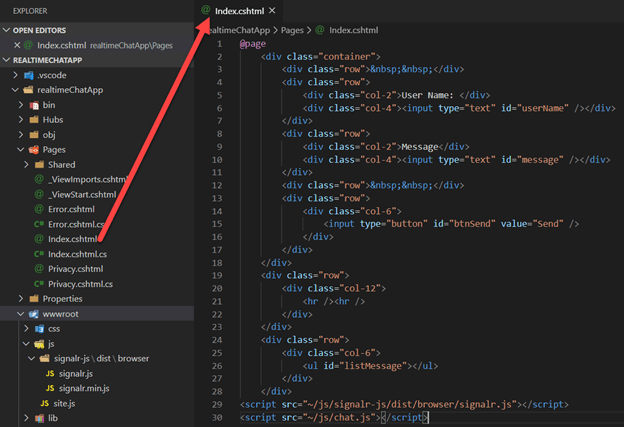
Step 13: We will create a UI screen where user can enter his name, enter the message and click a send button.
Go to Pages -> Index.cshtml and replace the code with the following code.

As you can see in the screenshot below, we are referencing two JS files. Once is the Signalr.js file that we installed with Libman and other is Chat.js.
Chat.js is that file where we will write our Javascript code that will connect to the Hub to send and receive messages with persistent connection.
Step 14: Now, create a file with name “chat.js” in the js folder in wwwroot and replace with the following code.
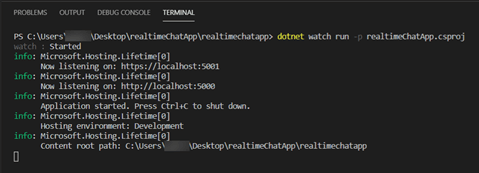
Last Step: Run the application with the following command.
dotnet watch run -p realtimeChatApp.csproj
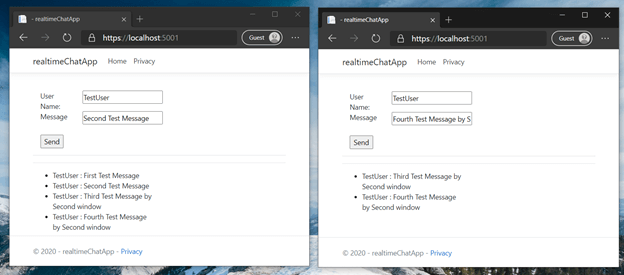
Now, Go to your browser and run http://localhost:5000. You will be able to see the UI page that we created. Below is the output.
If you notice above, we have two clients that are connecting to same hub. When one client sends the message, it is broadcasted to all connected clients.
So, this is how you can create a chat web app with ASP.NET Core 3.1 and SignalR. Some companies hire ASP.NET developers to build such web apps. You can create such a chat web app by following this complete guide.

Recent Blogs
Categories


