Steps to create a Canvas App
In this article, we are going to create a Canvas App type of PowerApps which users can use to create contact records in Dynamics 365. So as a pre-requisite create a Dynamics Trial or use the existing trial account.
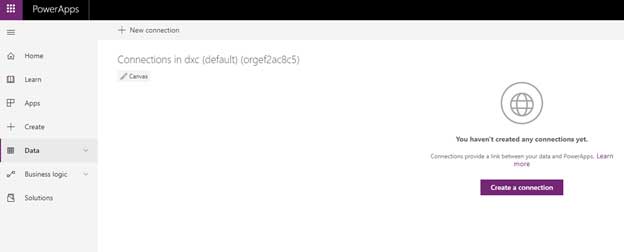
Login (or sign-in) to PowerApps StudioFirst create a connection that will allow the Canvas App to connect to Dynamics 365, for this click Connections inside PowerApps studio
Click on Create a connection to create a new connection
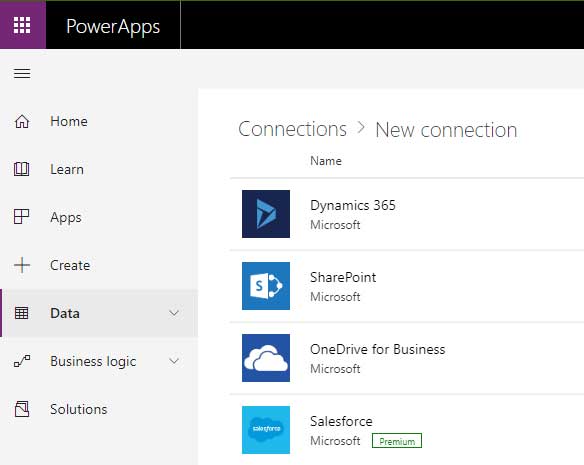
Select Dynamics 365
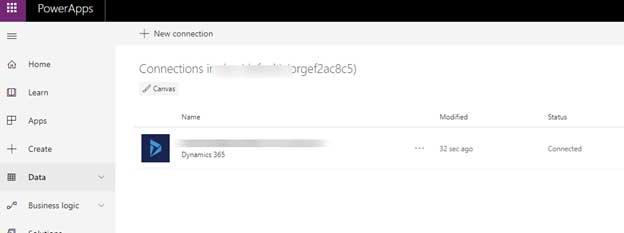
Sign In with the same account used for PowerApps for Dynamics 365 services created and this will create the connection.
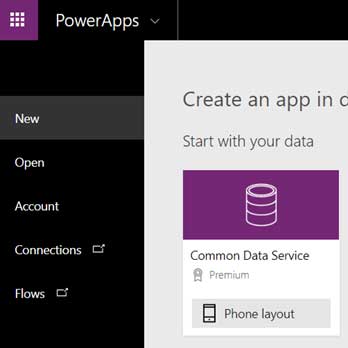
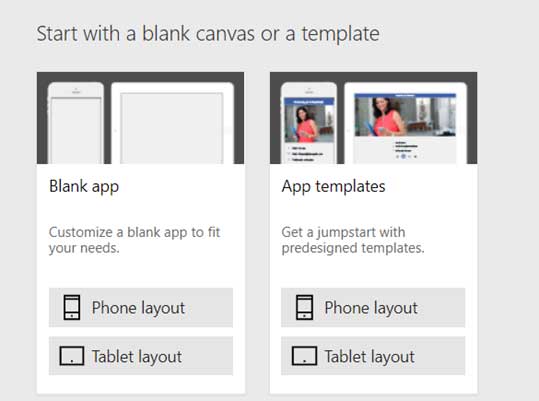
With connection created now let us start with Blank App with Phone Layout
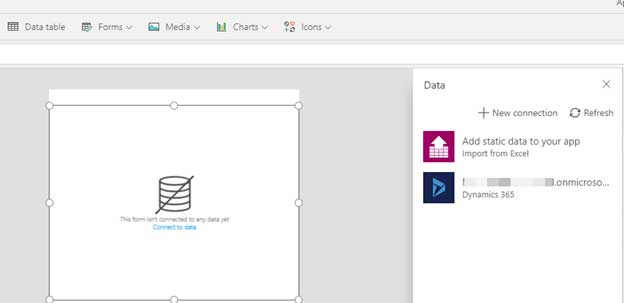
This opens the welcome screen inside PowerApps Studio, here we will select Create a form option. This automatically adds the form in the Screen inside PowerApps Studio.
Click on Connect to data and select Dynamics 365 connection we had just created.
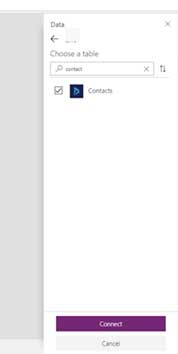
Select the Dynamics 365 instance (DataSet) to which we want to connect for data.
In the sample we will be creating contact records in Dynamics 365 services from PowerApps so search and select Contacts as Data and click on Connect.
ALSO READ
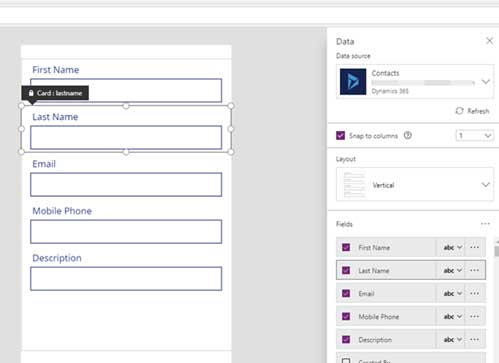
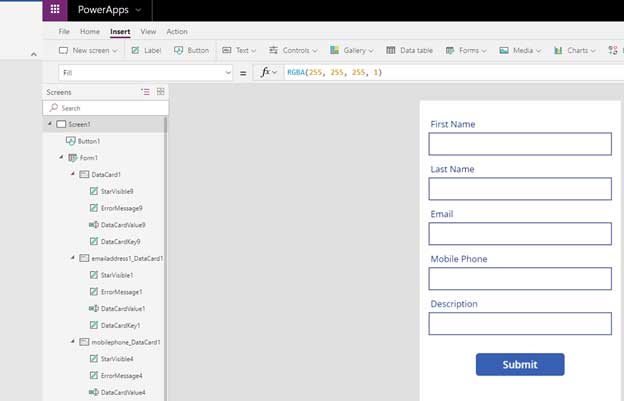
For the contact record, we only want the following fields First Name, Last Name, Mobile Phone and Email Address and Description so we specify the same in the Fields section of the Data Card and leave the other option as default as shown below and arrange the fields.
Click on Insert menu to add a button that will be used to save the new contact record. Rename the button to Submit.
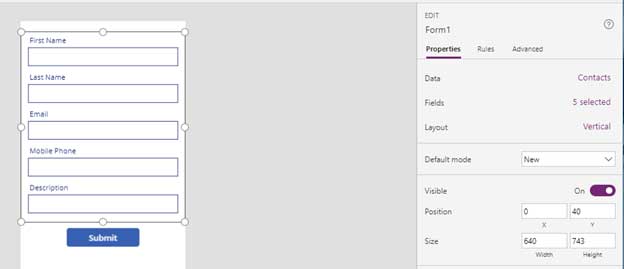
As the form will be used for creating a new contact record, select the Form and inside properties window change the default mode to New.
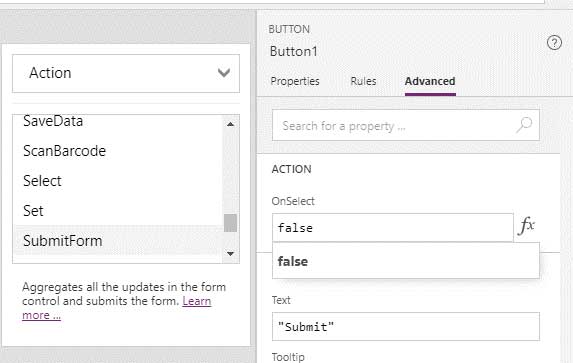
Now for saving the record back in the Dynamics 365 on click of Submit button, select the Submit button and select Advanced tab and specify the following value for OnSelect Action property.
Search for the Action named SubmitForm.
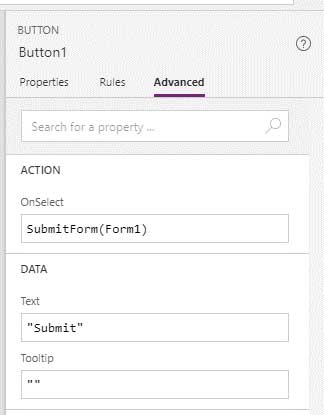
And pass the current form i.e. Form1 as shown below.
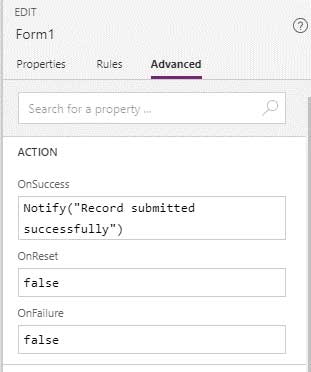
Similarly, for the Form1, we can specify OnSuccess Action values as Notify along with the success message.
This completes the designing of our CanvasApp.
Click on the run button on the menu to test the application.

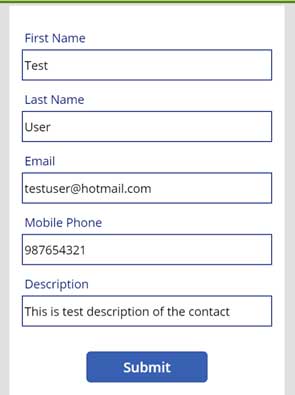
This opens up the app, enter the values for the fields and click on the Submit button to submit the data.
We’d get the message “Record submitted successfully” as specified in the OnSuccess property of the Form1.

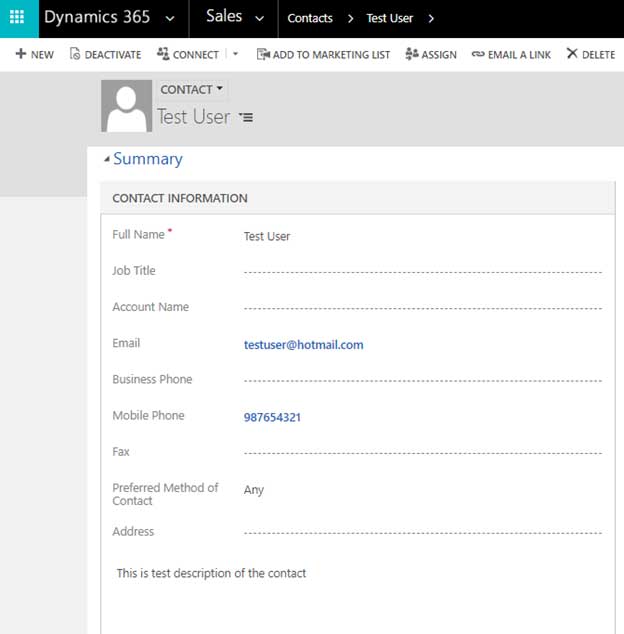
Now let us open the Dynamics 365 Instance to check if the record has been created or not.
As expected we can see the contact added in Dynamics 365.
Thus, we saw how easy it is to create a Canvas App using Dynamics 365 as a Data Source without writing a single line of code or as we say “no code” approach.


