Agenda
In this article, we will learn about the concept of Middleware, which is introduced by .NET Core team.
Pre-requisites:
- .NET Core 3.1 SDK
- Visual Studio code
- Basic knowledge of the pipeline architecture of .NET Core 3+.
What is a Middleware?
A middleware is a piece of logic or code, that can be injected in the request-response pipeline of a .net core application development services.
The HTTP requests in the pipeline are managed by Request Delegates which can be configured using three extension methods.
- Use This is used to allow the request delegate to pass the request to the next middleware in the pipeline.
- Map This branch the request pipeline with the mentioned URL In simpler words, this should be used in some specific cases where you want to map something to a special URL.
- Run This will be used to end the pipeline registrations and acts as a final step. In simpler words, this should be used at the very last step of the pipelines when you want to start the actual application.
Middlewares are registered in the Startup.cs file in a .NET Core application. Configure method handles all HTTP requests. You can register as many middlewares as you need, but the ordering is important.
Let’s move to the demo now for better understanding.
Step 1: Install .NET Core 3.1 SDK from Microsoft’s official website.

Install the SDK from the downloaded installer.
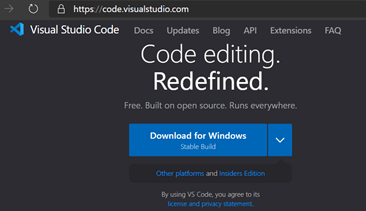
Step 2: Install Visual Studio Code editor. Please go to https://code.visualstudio.com and download the installer based on your OS Type.
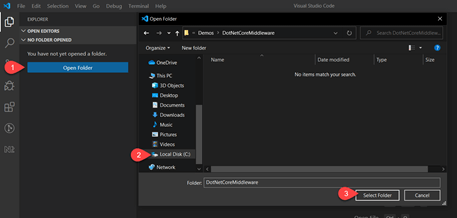
Step 3: Let’s create a new .net core project in Visual Studio code. Create a folder at C:\Demos\DotNetCoreMiddleware. Open this folder in VS code as shown below.
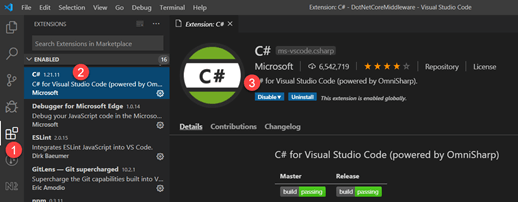
Step 4: We need to install an extension in VS Code which will activate C# features in VS code. So, install C# extension mentioned below.
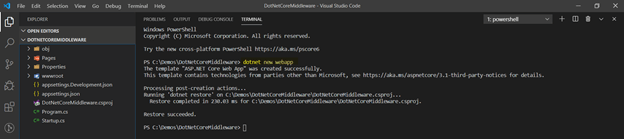
Step 5: Create an ASP.NET core web application using integrated terminal. Press Ctrl+~ to open integrated terminal.
Command: dotnet new webapp
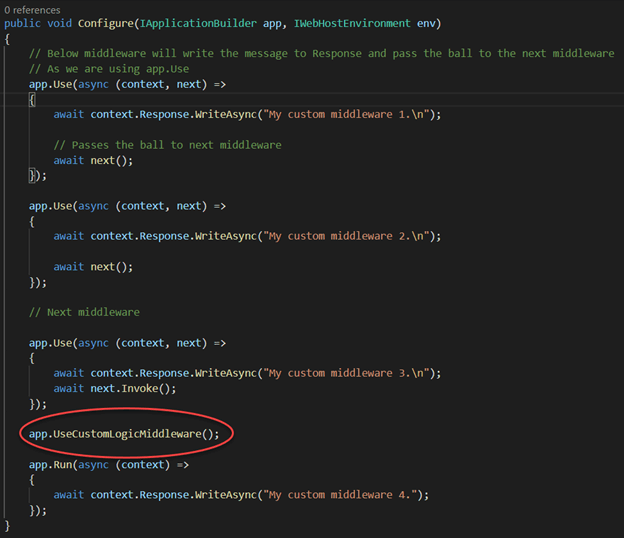
Step 6: Below is the startup.cs file where some of the in-built middlewares are already registered with the new project template.
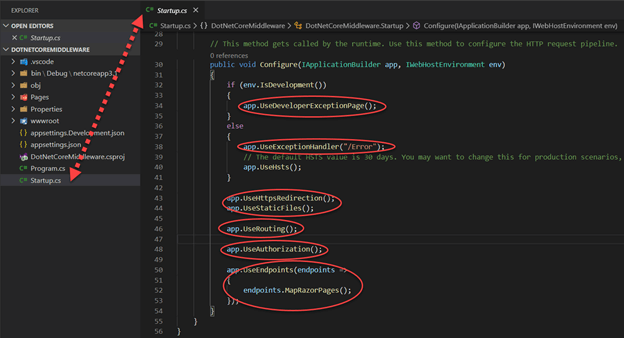
We can also create a custom middleware which contains our own custom logic and we can register it here.
Below is the example of in-line middleware registration.
Since we are using app.Use extension method, first declaration will execute the reponse line and then passes the execution to the next middleware using next() object.
Note: For better understanding, do read the comments mentioned in the screenshot below against each line.
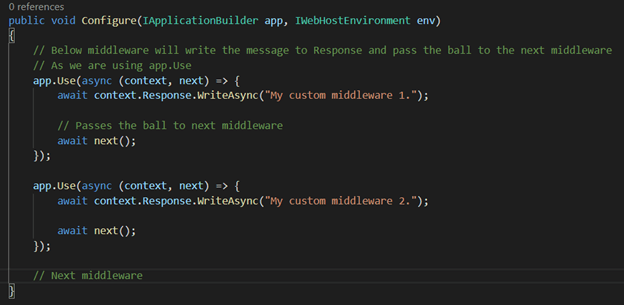
Below is the example of app.Run extension method which will end up the request pipeline registrations.
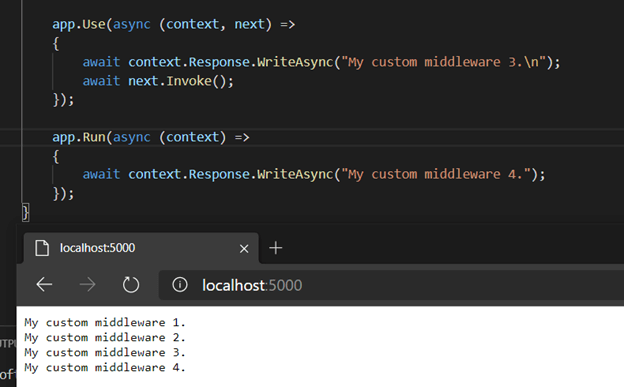
Now, let’s run the application and see the response.
Open the integrated terminal and hit the following command: dotnet run
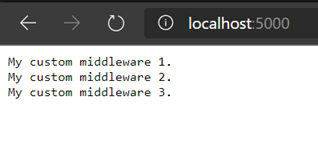
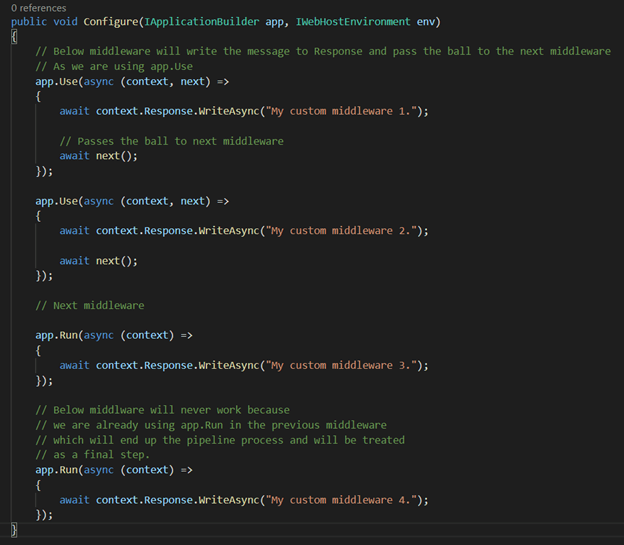
As you can see the reponse in the above screenshot, the 4th middleware is not executed.
ALSO READ
Now, if we convert 3rd middleware to app.use method, then 4th middleware will work. Below is the screenshot with code changes.
Now, I hope that you understood that how middlewares work.
Let’s create a custom middleware which resides in a separate folder and file and see the example that how to register them in request pipeline.
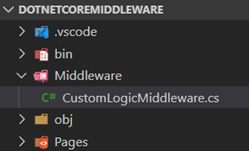
Create a folder with name Middleware and create a new file with the following name.
Now, copy the following code in the newly created file.
As you can see in the above code, RequestDelegate is used which will allow other middlewares to execute after the execution of this middleware.
We also created a static class at the last, which will register the middleware in the IApplicationBuilder container so that Startup.cs file can access this new method.
Now, I have registered this custom middleware before the app.Run method in startup.cs file.
Let’s re-run the application and see the response.

See the flexibility that .net core provides us. This will surely help each and every hire ASP.NET developer to follow the SOLID principles.

Recent Blogs
Categories


