In this article, we shall see how to implement, customize Swagger in ASP.NET Web API.
Prerequisites
- Visual Studio 2015 & later (any edition)
- .NET Framework 4.x installed in your machine.
- Internet access
What is Swagger
Documentation always stands as an vital part with APIs designing. Swagger comes in as a documentation of RESTful APIs detailing its methods, parameters with datatype to be used along with output schema and headers information.
Swagger is representation of RESTful APIs endpoints. It helps developer consuming API, to understand methods definitions without actually looking into code written behind it. Consumers of APIs can visualize endpoints, helping in to better understanding of service and its methods.
In very simpler terms, Swagger helps in providing detailed specifications in a Visualize manner of RESTful Web APIs.
Building a basic ASP.NET RESTful Web API
Open Visual Studio (article is using Visual Studio 2017), create new ASP.NET Web project and give project a Name.
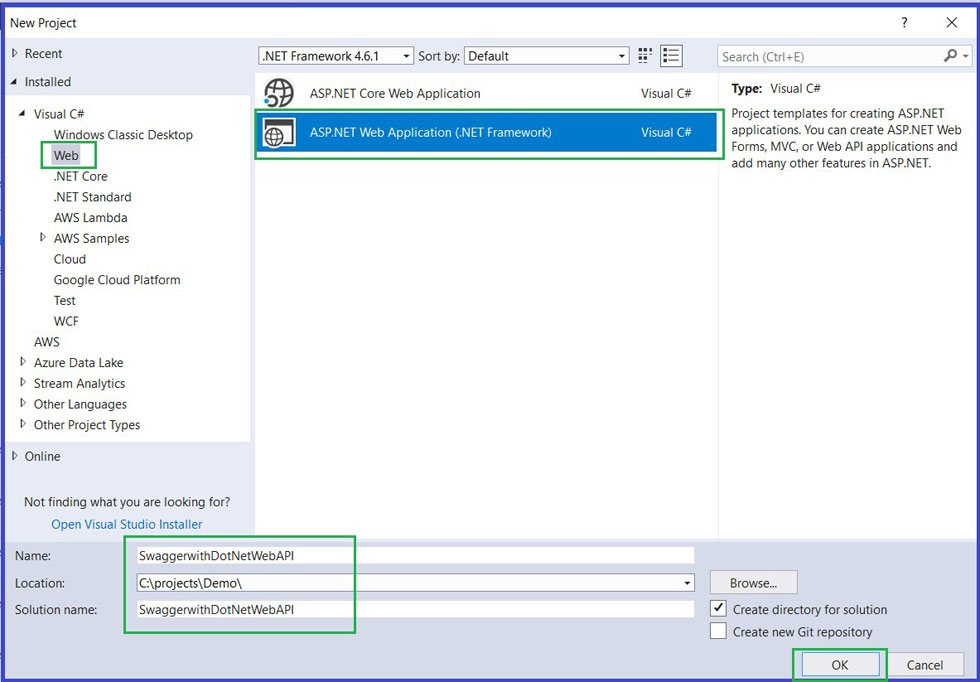
Select Web API as project template, and click Ok.
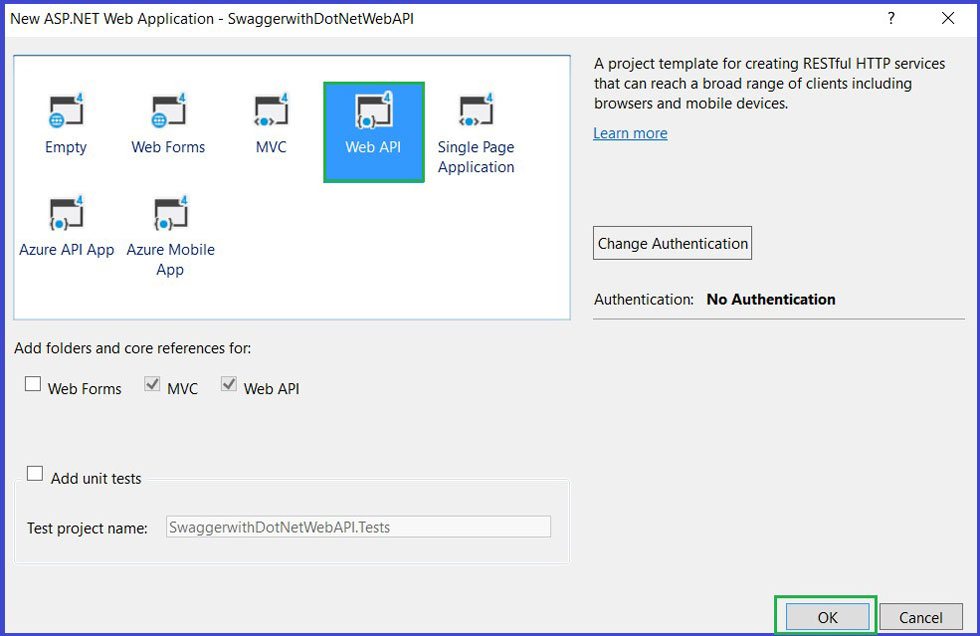
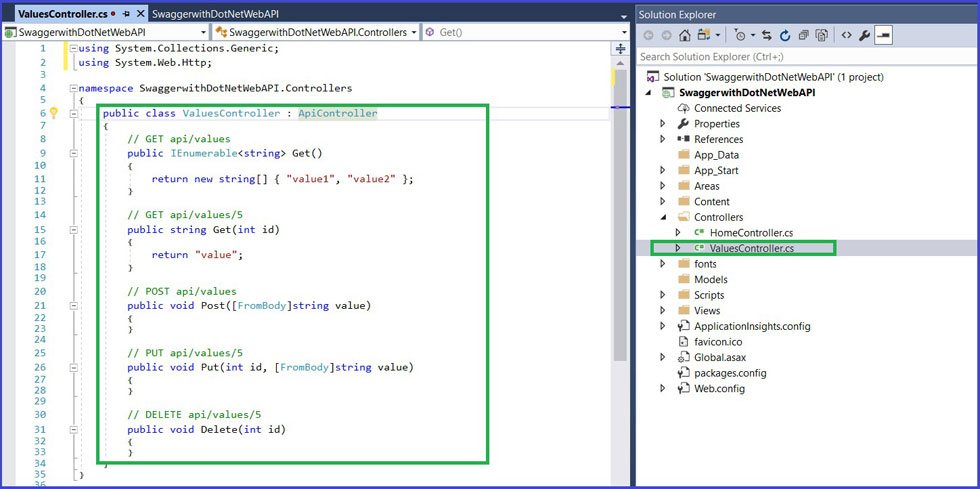
This will create a basic ASP.NET Web API with controller name Values. This comes with built-in sample code for CRUD operations
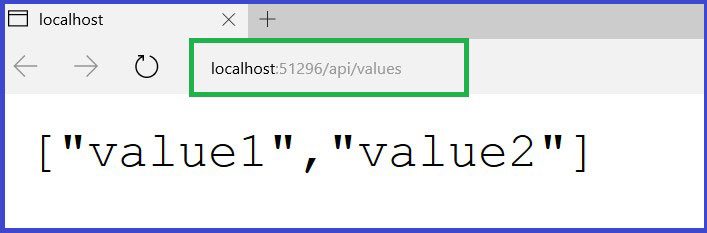
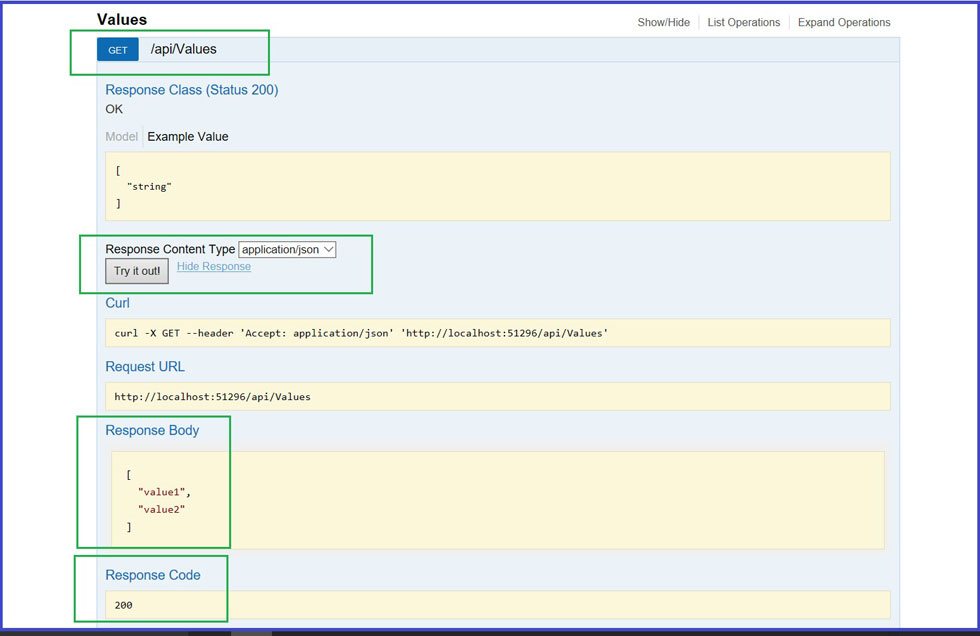
Build and Run the application, navigate to {localhost}/api/values Would display result as seen below, executing Get method of Value Controller.
Implementing Swagger
Open NuGet Package Manager. Right Click on Project ad select Manage NuGet Packages.
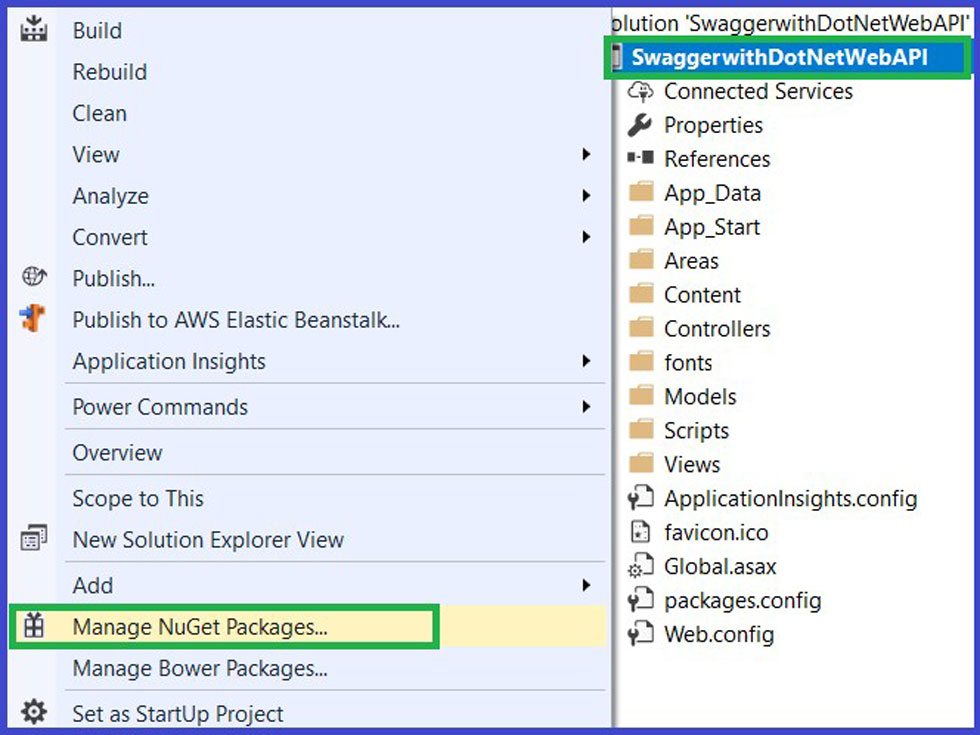
Click on tab ‘Browse’.
Type, ‘Swashbuckle’ in search box. Check ‘’Ínclude prerelease’ checkbox and press enter.
This will list project as shown in below image.
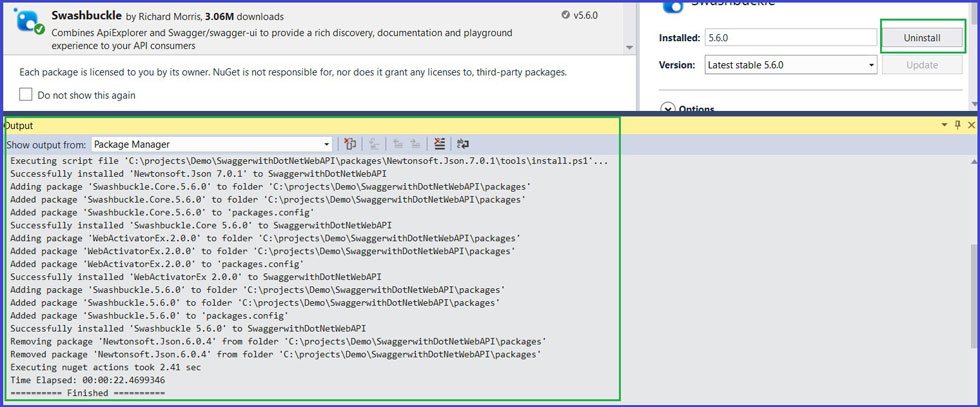
Select the one as shown , and click on Install.

This will install all the required reference libraries required for Swashbuckle project.
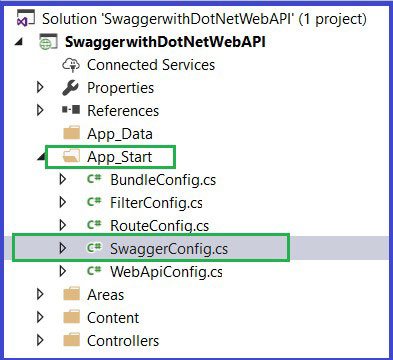
Go to Solution Explorer and check project folder App_Start.
A new file name SwaggerConfig.cs will be added to said folder. This confirms our successful installation of Swashbuckle project.
Build project and press Ctrl + F5 to launch the Web API.
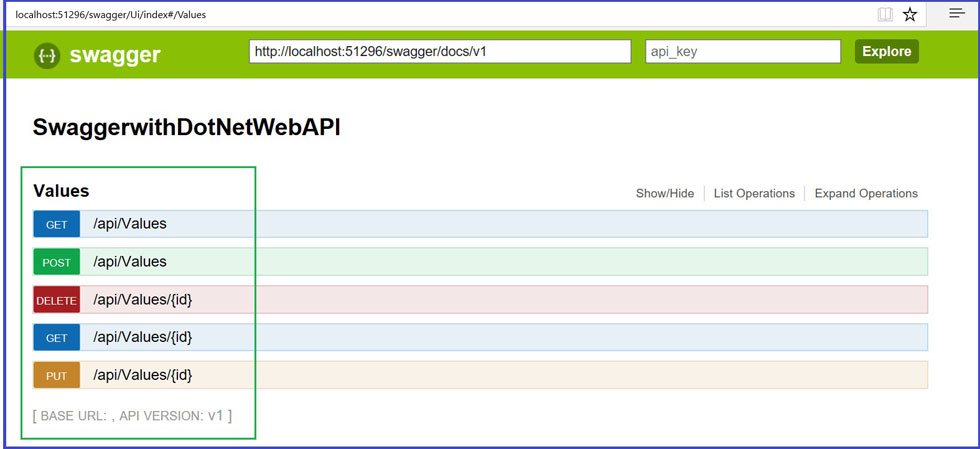
And navigate to {localhost}/Swagger , this will open up Swagger UI,
{localhost}/swagger/UI/Index
This will list all the methods of Value controller as seen in below image.
Click on any tab listed, and it open up with details like parameter expected to be enter, its Output schema along with a Try It Out button to test the endpoint. On clicking said button, it displays the desired output with Response Body and Response Code.
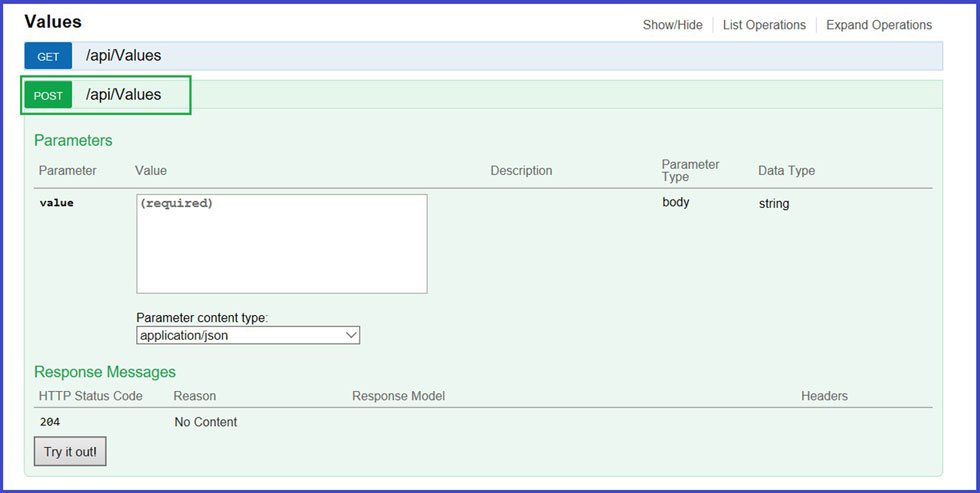
Same goes with other methods, with POST method,
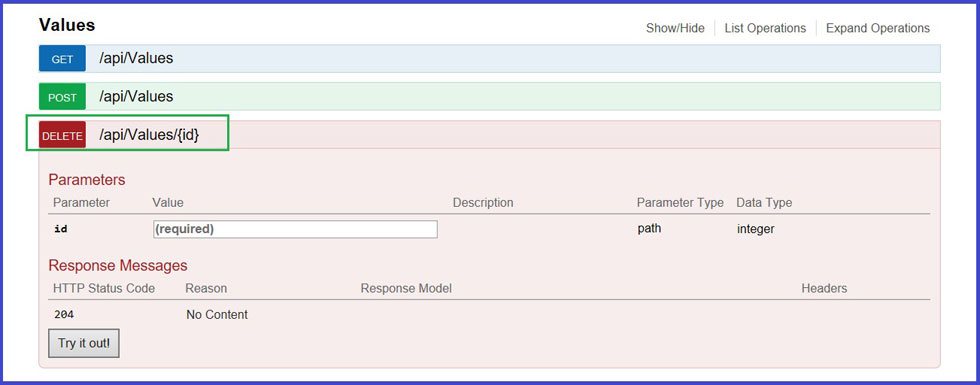
With DELETE method,
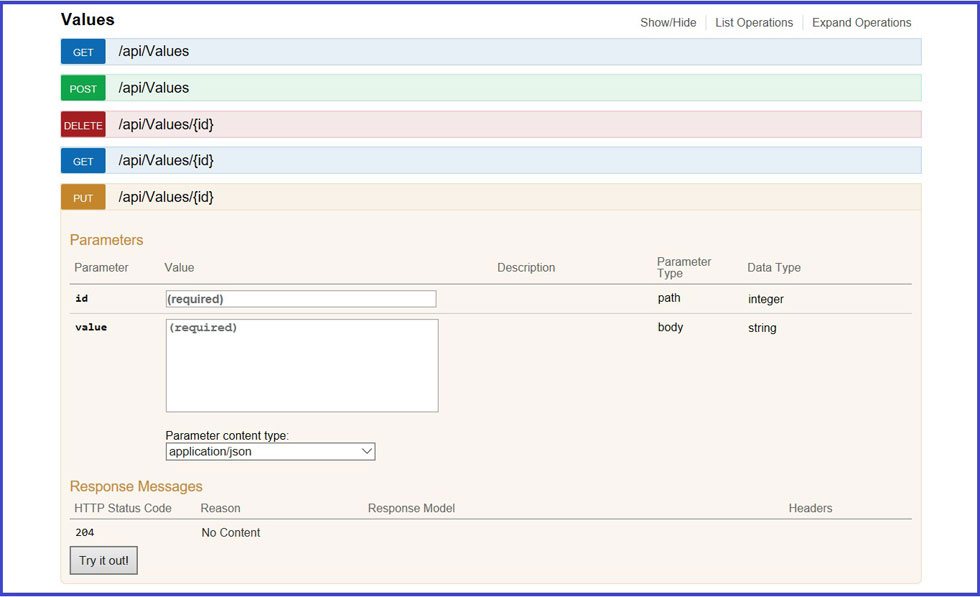
With PUT method,
In this article, we shall customize our Swagger UI with implementation of displaying Methods comments, added in code file.
It’s always recommended to enter comments for methods stating details about the endpoint. Details like what does that particular method or endpoint returns, any information about the parameter being passed and so on. Our objective is API should be understandable or readable for Consumers and Clients consuming API.
Question will arise, comments are made in code, then how it would be helpful for client. Answer is Swagger again. Yes, Swashbuckle a has a provision to display these comments, written in code, in to Swagger UI.
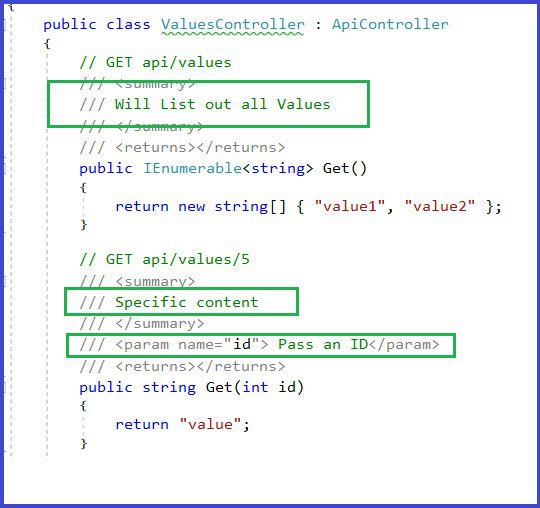
Add few Comments
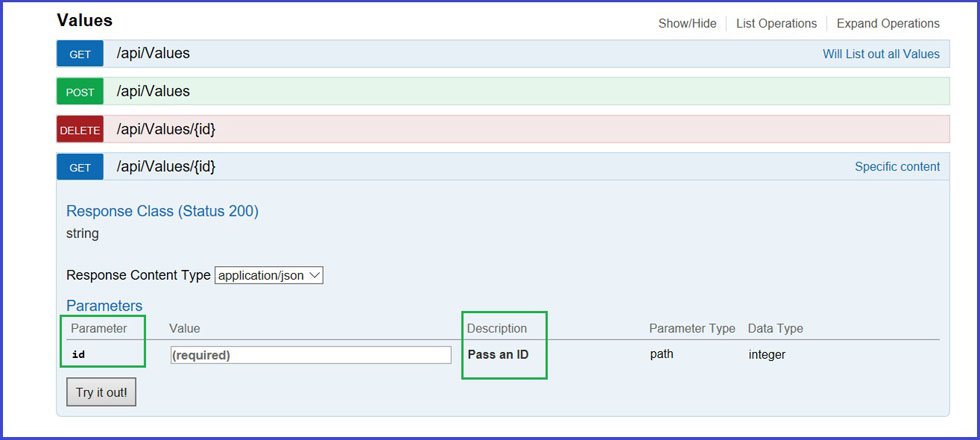
For GET method, add few lines of code above method section. Also add few information regarding parameter id being passed, as shown in below image.
After adding comments, go to App_Start folder and open SwaggerConfig.cs file.
Go to line number 104 or search for keyword ‘IncludeXmlComments’
Once you are on said line, uncomment the code.
Visual Studio will prompt asking to create Method, ‘GetXmlCommentsPath()’ , follow the suggestion and create method, as seen in below images
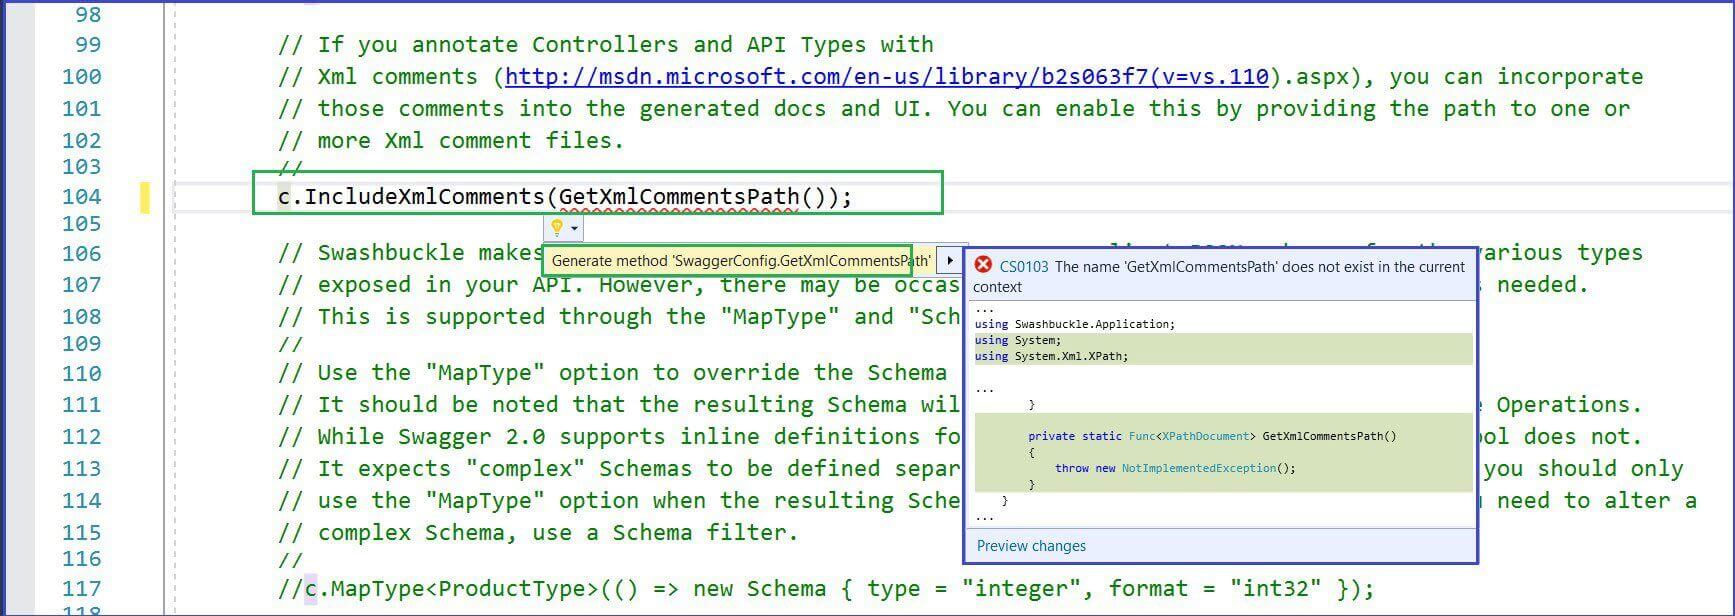
Method name ‘GetXmlCommentsPath()’ is created.

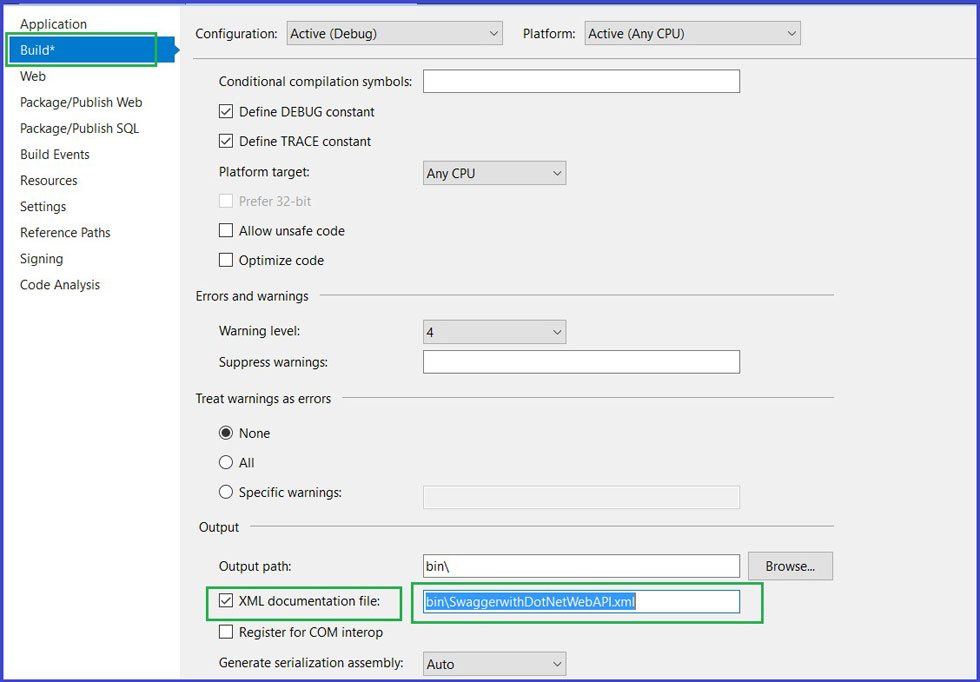
Go to Solution Explorer, Right Click on project and Click on Properties.
Now, click on Tab Name Build at left pane.
Under Output section, Check the box ‘ XML documentation file’ and copy the path being displayed.
At this path an XML document is being generated with all the comments added.
Return the newly added method in SwaggerConfig.cs, with copied XML location. Refer below image.

Again, build the project and launch application by clicking Ctrl + F5
Navigate to {localhost}/Swagger/
Comments are now displayed against the method.
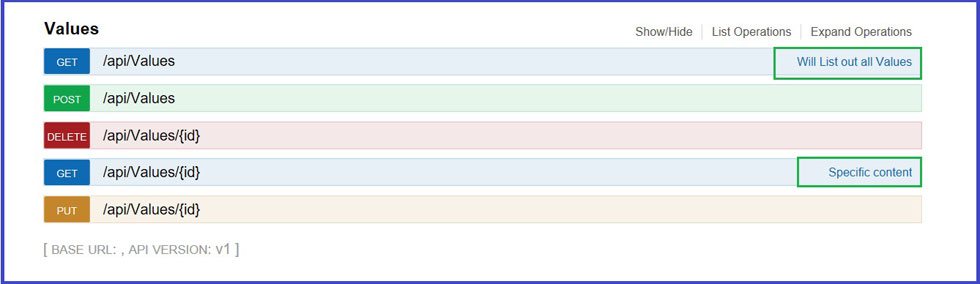
Also, parameter details we added are now part of Swagger API
We can decorate the Title, specify the version number, can change the look n feel of Swagger API, can implement Javascript functions in UI and many similar customizations by tweaking code in SwaggerConfig.cs.
We saw how useful it is to have Web APIs with proper documentation. This not only make API readable for Client but also makes life easy for developers and Testers. Would recommend to try what you learned from this article. This goes with ASP.NET Web APIs. For implementing it with ASP.NET Core especially Core 2.0, implement with ASP.NET Development Services.

Recent Blogs
Categories


