Asp.net development is an interesting platform and major developers today, are learning and grasping skills to make best development practices. This article is about ASP.NET developers' techniques to authenticate social media in MVC. You will learn every step involved in the process of authentication of FB/Google+ in MVC development.
In this section we covered following points,
- Why social media authentication is important to add in your web site.
- Is Login with social media is secure?
- Basic work flow of social media authentication.
- How to implement login with Facebook and Google+
- Sample App with API Response Example
Why social media authentication is important to add in your web site?
One of the core functions of any modern website is the ability to leverage Social Authentication (also known as Social Login).
Normally in any website, we develop there are two common features is there login and registration. In registration, we ask for basic information to fill from the user. And at the back, we store user-filled information in the database and give users unique identification through identifying users when it’s login into our website. Now a day’s everything is online and most of the work is done through the web. So as a user point you, he/she might be going through normal procedure to fill form and register and after registration login and access the website.
So, Social login is a form of single sign-on using existing login information from an identity provider such as Facebook, Twitter, Google, or Microsoft—popular social media platforms to sign into a third-party website and using third-party response create a new login account specifically for your website.
Is Login with social media is secure?
Social login is powered by OAuth. OAuth is an open standard for authorization. OAuth provides client applications 'secure delegated Access’ to server resources on behalf of a resource owner. It specifies a process for resource owners to authorize third-party access to their server resources without sharing their credentials. Specifically designed to work with Hypertext Transfer Protocol (HTTP), OAuth essentially allows third-party clients to issue access tokens through authorization servers, with the consent of the resource owner or end-user. The client then uses the access token to access the protected resources hosted by the resource server. OAuth is commonly used as a way for web surfers to log into third-party websites using their Facebook, Twitter, Google, or Microsoft accounts, without worrying about their access credentials being compromised.
Basic work flow of social media authentication
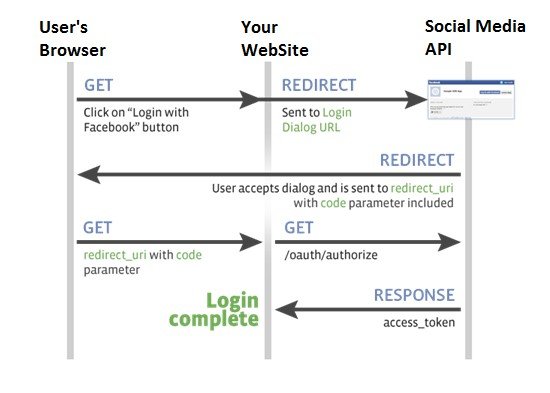
How to implement login with Facebook and Google+?
1) Login with Facebook.
To implement login with Facebook in Asp.net web form you might follow the below step.
Login with your Facebook account in below link facebook
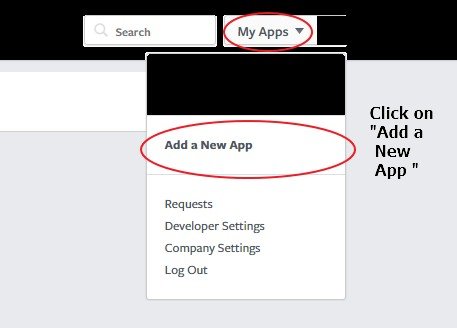
Create new App
Select Platform of your application or website
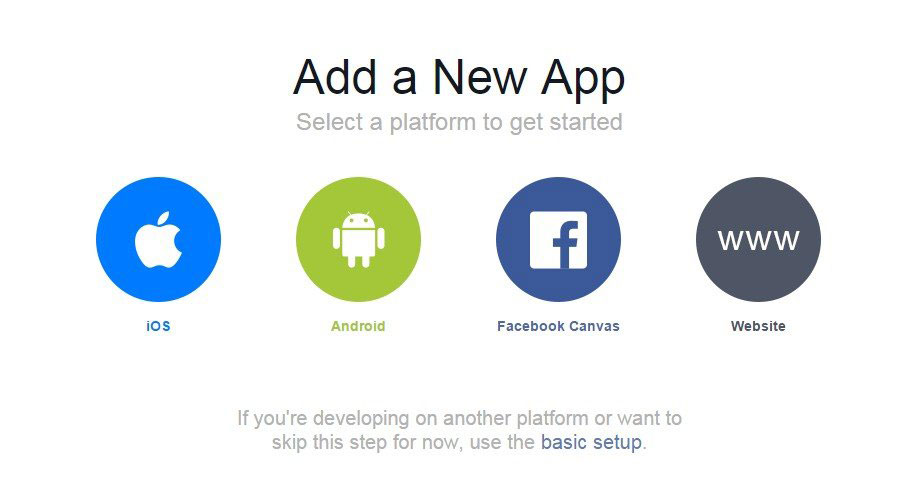
Here, we select website.
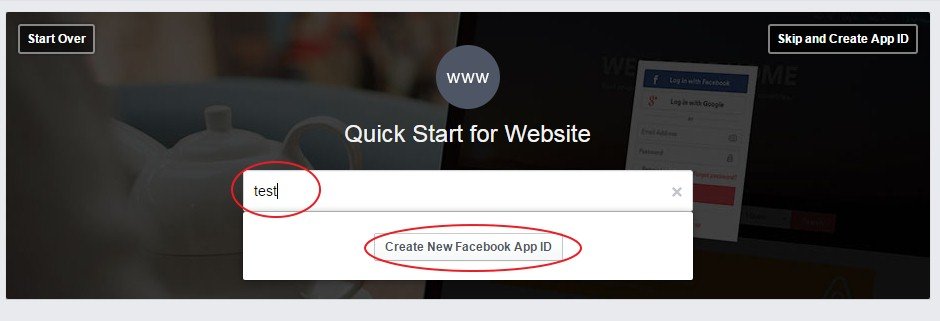
Create your app name and click on “Create New Facebook App Id”
After that one dialog box open select your app category and click on “Create APP ID”
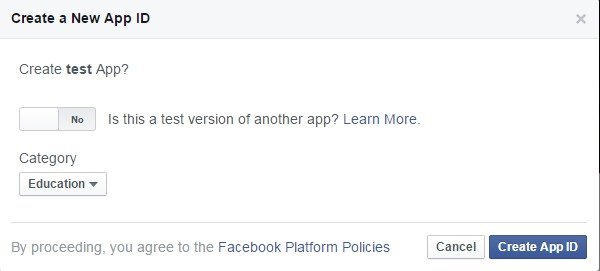
After that you may see following page that contain your app id.
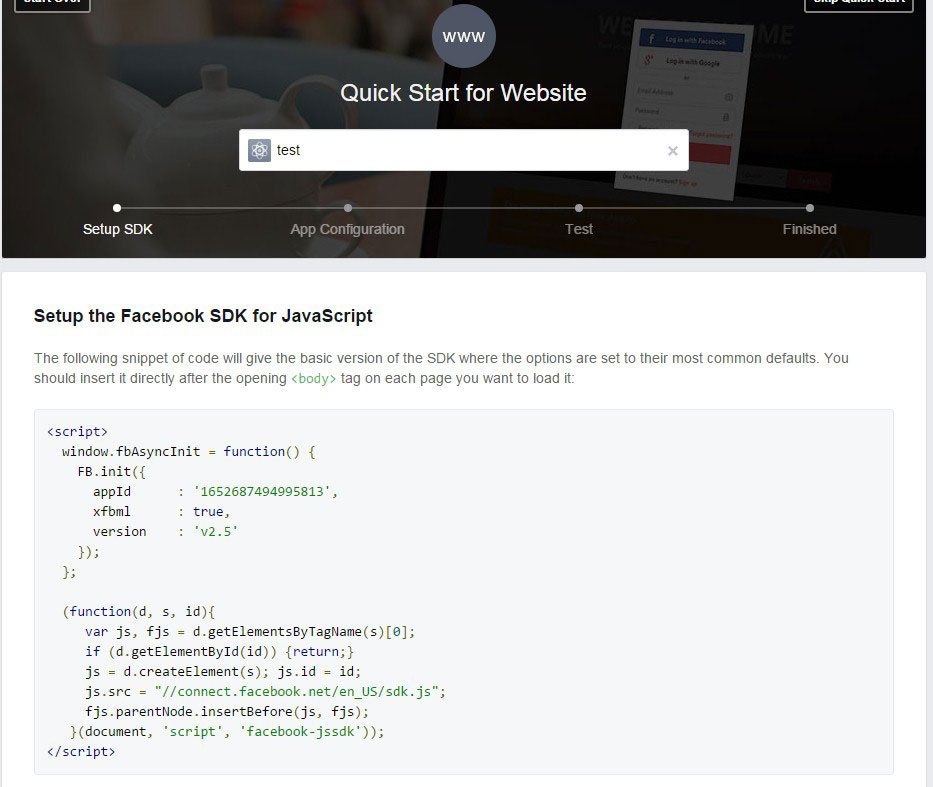
Now Add your web site url and click on Next.
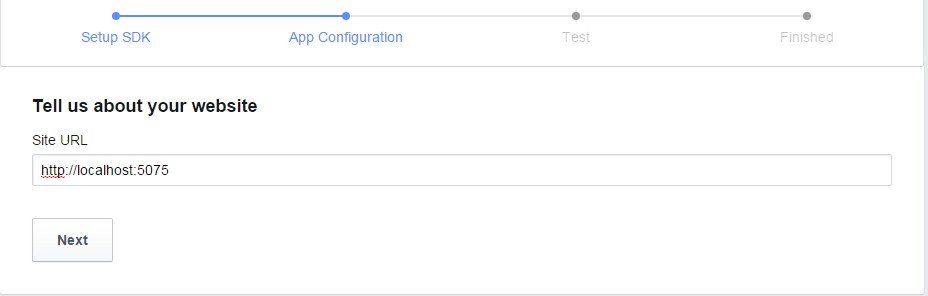
Now all set, your Facebook app id is created and now we can use this id in our website.Now we implement Login with Facebook in Web Form
And Now Add One Button to invoke request to login with Facebook.
Now all is Done, Login with Facebook is successfully integrate with your Website.
2) Login with Google +.
To implement login with Google + in the Asp.net web form you might follow the below step.
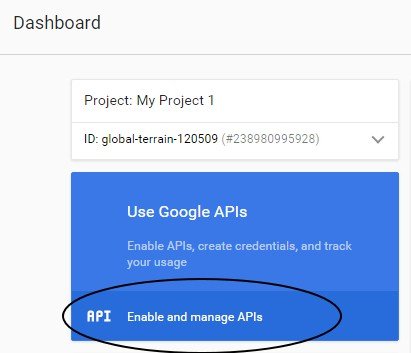
Login with Google Account in Below link https://console.cloud.google.com/apis/dashboard
Create New Project.
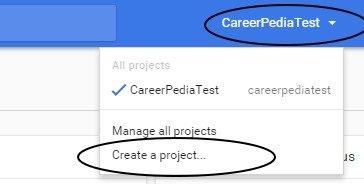
Add Project Name and click on “Create”.

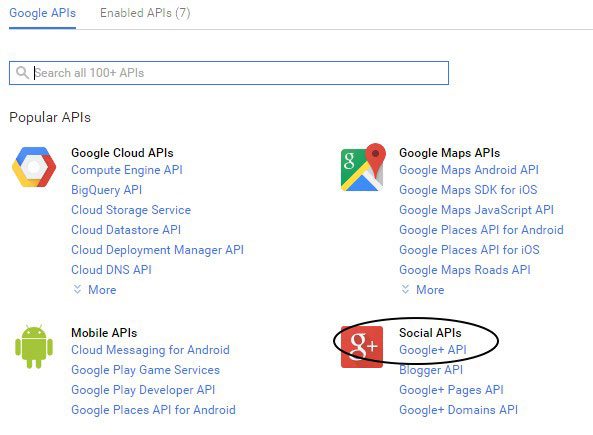
After that you may see the project Dashboard and now you may enable Google + API for your project.
Select Google + API
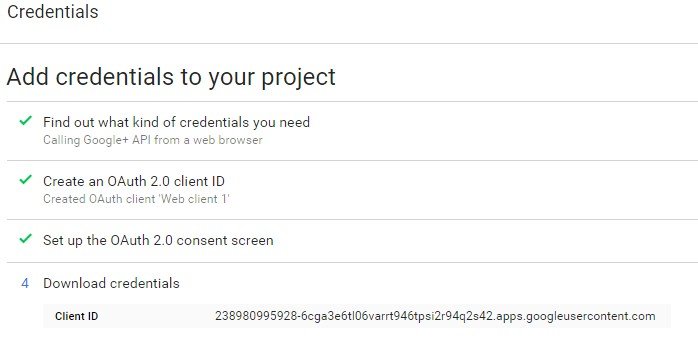
After selecting Google + API Enable Api and you may see below dialog box appear to get Credential for your project.

Follow all steps to get your project credential and finally at the end you get your project Client ID this ID is used on our web page to invoke login with Google + Login request.
Now allset, we can use Generated Client ID in our Web Form. Now Code we have to add in our web form is below.
And Now Add One Button to invoke request to login with Google +.
Now all is Done, Login with Facebook is successfully integrated with your Website. Now at the back end, you have to implement a method that stores the information and authenticates the user when the second time comes.
If you get errors in integrating Social Authentication on your website, you can search for that particular error, or you can hire dedicated net developers to do the same. They are experts in solving such types of complex errors.
Sample App with API Response Example
Facebook.
Above code we create two button to invoke Facebook API and Google + API so the out is like,
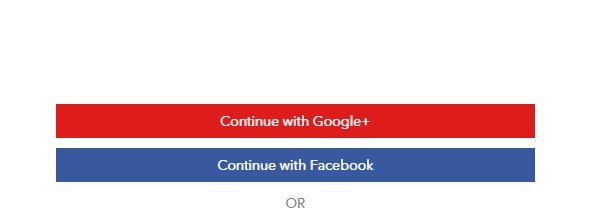
Click on “Continue with Facebook” and after click on it one popup window is open.
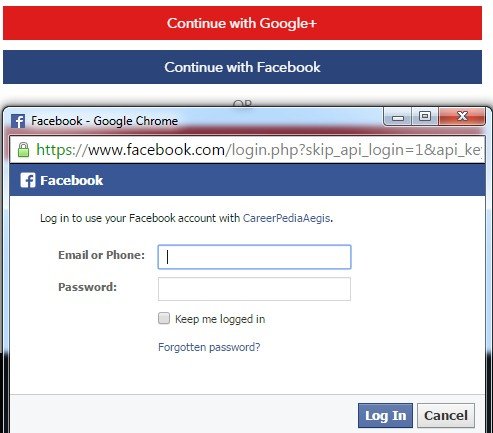
Here, in this window the user can fill in his / her account credentials and click on "Login", so, after clicking on the login button, Facebook is the authorized user and can return positive or negative feedback to our application.
Facebook response.
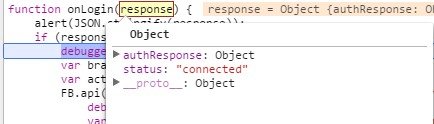
So, in the above status “Connected” means the user is successfully authenticated. Now we invoke the FB.api method with a certain parameter to retrieve user information. And after that FB.api give response give it back like,
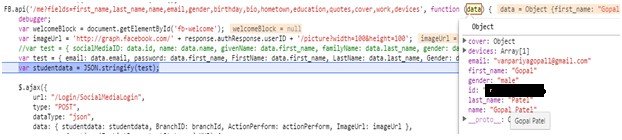
Now we convert the response into a JSON object and invoke our controller action method to process login requests. (Store user info if a user is using our website the first time and if it a second time then identify the user(using id value that is given by FB.api which is unique.) and allow the user to access our website).
Google +.
Click on “Continue with Google +” and after that following popup window open,
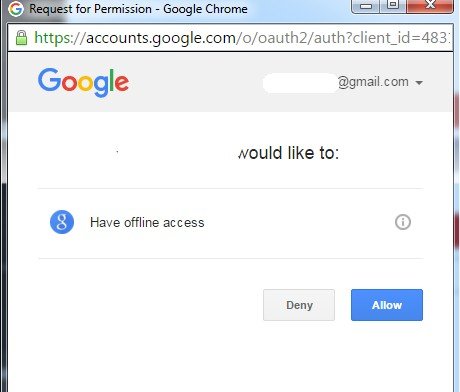
The screen above appears when you enter Google Account credentials and the Google + API asks the user for permission to share profile information on a specific site or application.
When user click on “Allow” button Google + API give it back response to our site or app like,
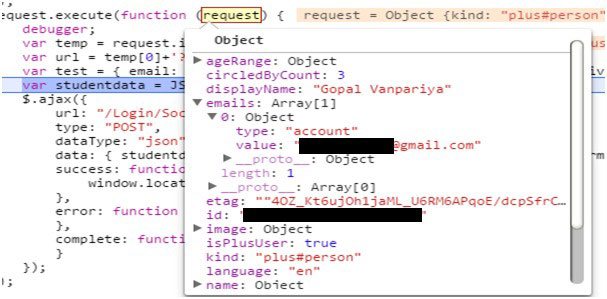
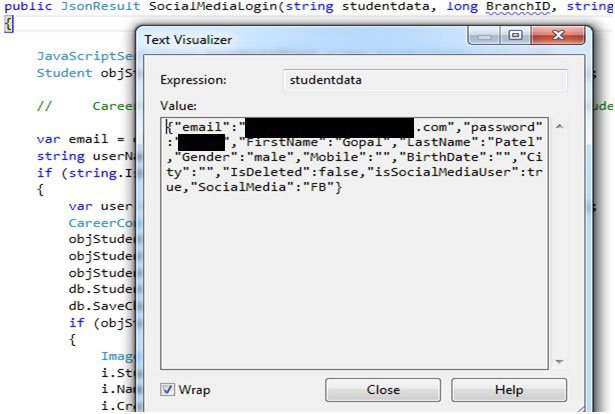
So, in the above screen is the response that came from the Google + API. Here response contains user profile information with email and one unique id to identify the user. The rest of the other process is the same as Facebook so, convert response in JSON Object and invoke particular controller action method to further process the login request. The author has used simple coding and techniques to make you learn the process of authentication of FB/ Google+ in MVC development. This article is purposely intended for ASP.NET developers and the development community, indeed.

Recent Blogs
Categories


