Step 1: Navigate to https://git-scm.com and download GIT for your operating system.
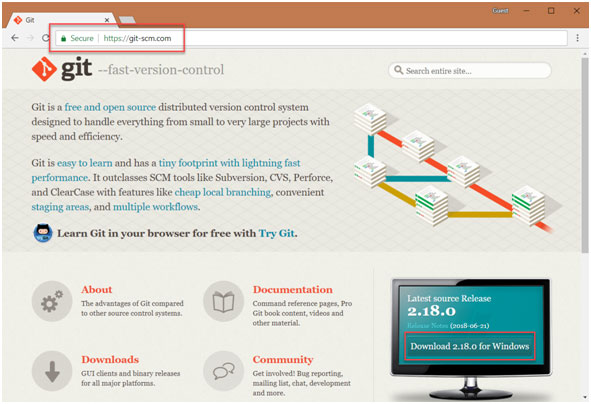
Once you have downloaded it, it will download the executable file and follow the on-screen instructions to install GIT on your system.
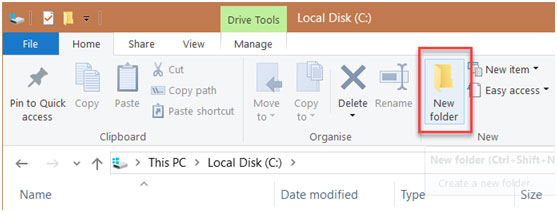
Step 2: Create a repository. You can use an existing project folder to be a repository. I am using a blank folder as a repository.
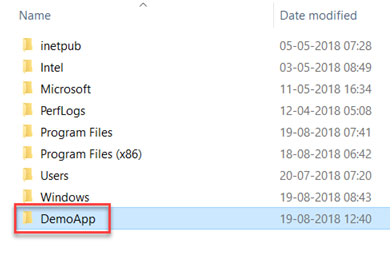
I have created a new folder named ‘DemoApp’ in C:/DemoApp.
Once we create this folder, it is a blank folder. Now must create it as a GIT repository so that GIT can track the changes inside this folder.
Step 3: Find GIT Bash in your start menu and click on it.
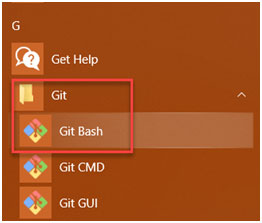
Step 4: Once you click on it, it will open a colourful command line tool, where you can write commands.
Now, move to the directory where you created the new folder.
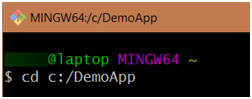
Step 5: Now, we will write ‘git init’ command, and it will make this folder a GIT repository.
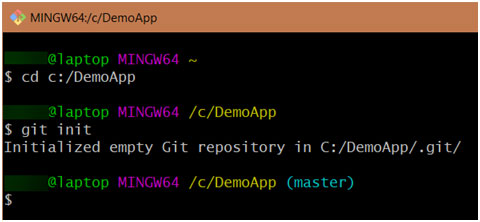
As you can see, once we run the init command, it starts it in the repository and the blue color '(master)' is displayed. This indicates that we are in the Master branch of our GIT repository.
Open the repository folder, and you will see that it is blank. But, go to View Menu, and select the Hidden Items checkbox and you will be able to view it, there is now a hidden .git folder.
This folder maintains the complete history and tracks all the changes in that repository.


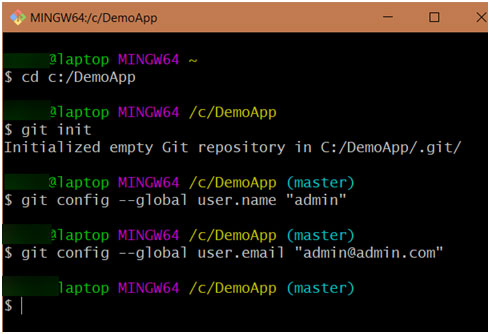
Step 6: Now, we need to set global configurations like setting up username, and email id.
Follow the commands below:
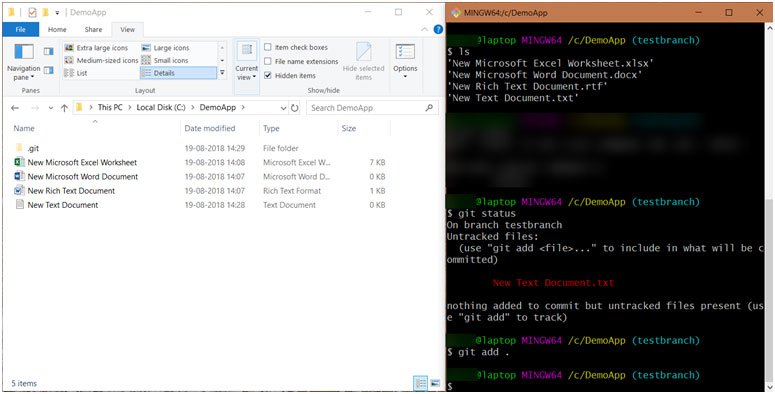
Step 7: Lets add some new files to our repository. Once you add, you can see then as untracked files in git bash. For this, you need to enter ‘git status’ command.
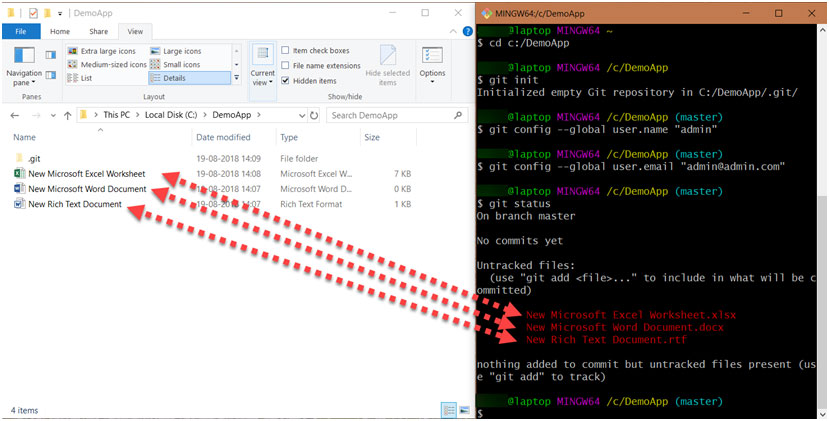
As you see in the above screenshot, I added three files to my repository, and when I hit the ‘git status’ command, we can see those three files in the ‘red’ color under the category of untracked files.
This means that even if you try to commit them to the repository, they will not be added to your commit. So, you need to add them to the tracked files.
Step 8: Now add the untracked files to the tracked files using ‘git add .’. This period(.) at the last of the command means all untracked files to be taken care.
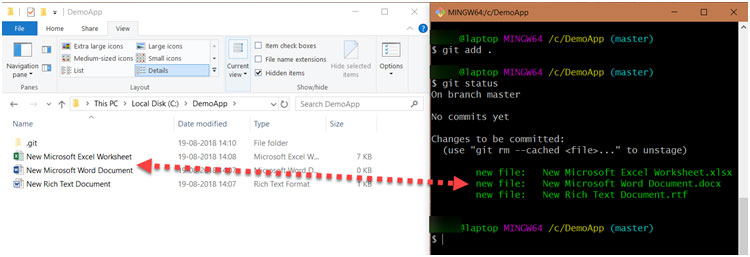
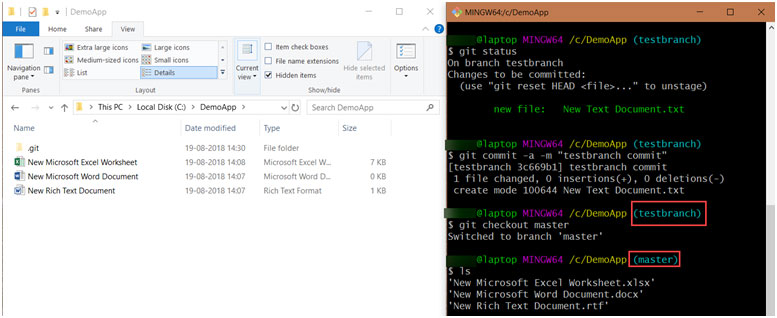
You can see above that now, after adding the files to the tracked files, and if we hit the ‘git status’ command, then those files are now in ‘green’ color and are shown under the category ‘Changes to be committed.
Step 9: Now the time has come to ‘Commit’ the changes to our repository. Commit states that we are done with the changes and now we want to finalize them in the repo.
Use command ‘git commit -a -m “Your message”’.
In the above command (-a) stands for all tracked files, and (-m) stands for any user message that you want to save with that commit.
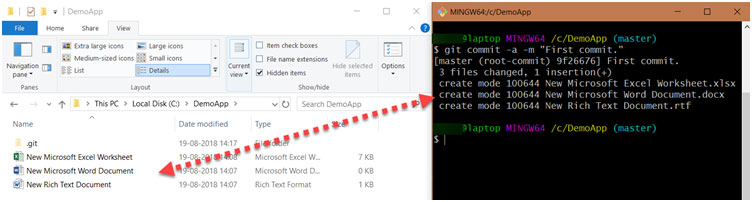
Now our changes are committed to our repository.
Step 10: For example, I want to know the commits that I made in the past. So, the command ‘git log’ can help us.
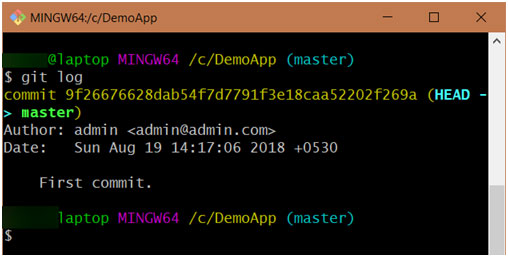
You see in the above screenshot, the commit that we made in Step 9 is shown as history.
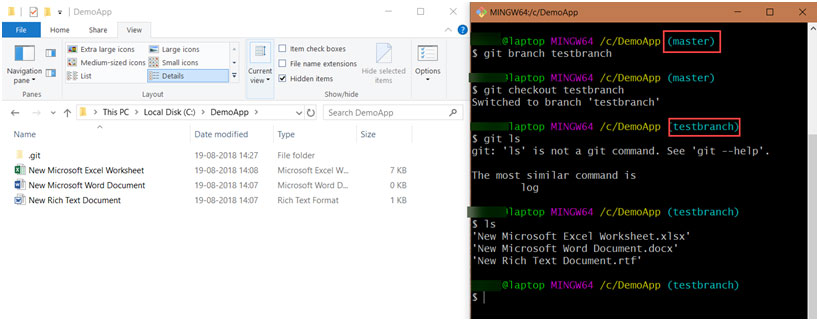
Step 11: Now, we want to create a Branch based on the data in the ‘Master’ branch. So, follow the below screenshot.
In above,
- In first command, we create a branch with name ‘testbranch’.
- Since you see in blue colour, we are currently in master branch. Now, I want to move to our new branch, we use checkout command as shown.
- When you get switched to other branch, then your new branch will be visible in blue colour.
- In third command, I intentionally wrote incorrect command, so git throws error and it also shows some suggestion. So, it is sometimes a helpful feature.
- In the fourth command, ‘ls’ is used to list all the items in the current directory. We created our new branch from master, so the master had 3 files, so the new branch also shows a list of three files.
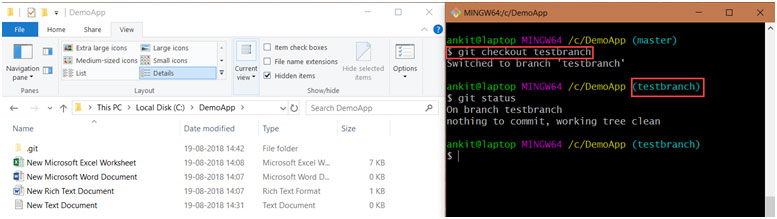
Step 12: Below are a few self-explanatory screenshots. I just added some files, add them to the tracked files, committed them, and moved to another branch and a few more examples.
Have a look at them, I am sure, you will understand easily.