In this blog, we shall learn how to work with Azure File Storage using Azure Storage Client Library for .NET and Visual Studio 2017 with C# as a programming language.
For novice Cloud developers, aspiring Cloud architects and all other IT professionals associated with Cloud computing, especially with Microsoft Azure, this blog will explain the importance and capabilities of Microsoft Azure File Storage.
Pre-requisite
- Microsoft Azure Subscription – Sign up for Azure Free account
- Azure Storage Client Library for .NET
- Visual Studio 2015 and later
- Knowledge of C# programming.
- Zeal to learn Azure
- Access to Internet
Quick Overview
Azure File storage service,
- Securely managed File share on Cloud.
- Quick access to files with high latency, low bandwidth links via smart caching.
- No complex management of deployment hardware or operating system for File shares deployment.
- Makes Cloud migration possible for file share dependent applications with no breaking change in code.
- Support Azure File share mount from Windows & Linux.
Getting Started
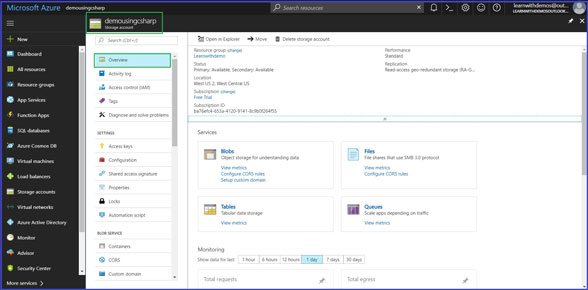
For the brevity of this blog, we have created a Microsoft Azure Storage account using the Microsoft Azure portal. Click here, to learn how to create an Azure Storage account using the Microsoft Azure portal. (Will share article soon) Navigate to Storage Account => Overview section.
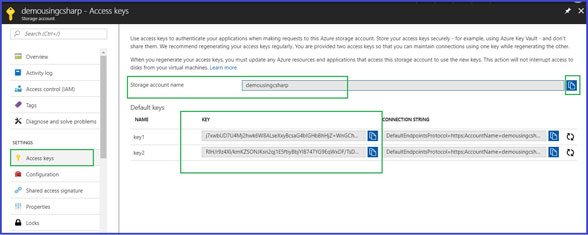
Navigate to Access keys section. Copy Storage account name and key (any one). We shall require this details in order to get connected with Azure storage account in our application.
Open Visual Studio, we will be using Visual Studio 2017 v15.5 Create a new ASP.NET console application. Give any name to application, here we shall name it as ‘LeaningAzureFiles’. Go to Solution Explorer => Right click on Project => Click, Manage NuGet Packages. Enter ‘Windows Azure Storage SDK’ under Browse tab => Search box With Include prerelease box as checked.
Select the very first listed library, as shown in below image.
WindowsAzure.Storage:
Client library for working with Microsoft Azure storage services including blobs, files, table and queues. This library is provided by Microsoft with current stable version as 8.4.0 (at the time of writing this blog) Click on Install.

Once library is installed, we can notice an addition of new libraries in our project reference folder. Open file Program.cs
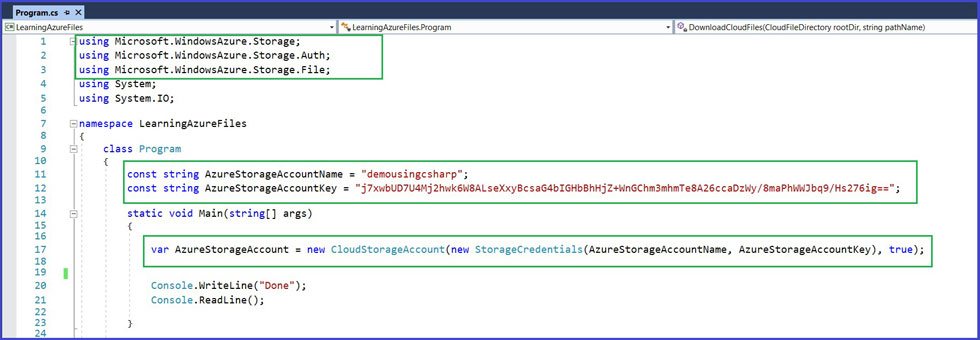
Add following code to import required namespaces,
using Microsoft.WindowsAzure.Storage; using Microsoft.WindowsAzure.Storage.Auth; using Microsoft.WindowsAzure.Storage.File;
Declare two Constant string variables,
- AzurestorageAccountName (Variable with any name can be declared): Storage account name. Paste name we copied from Azure portal as storage name.
- AzureStorageAccountKey (Variable with any name can be declared): Keys for accessing Azure storage account. Paste any one key among being provided in Azure portal.
Using above values or details, we shall create connection with our Azure Storage from application. For doing so, create a new instance of CloudStorageAccount, CloudStorageAccount represents Microsoft Azure Storage Account. This class is from Microsoft.WindowsAzure.Storage namespace. It initializes Azure storage account instance.
It requires two parameters,
- Storage Credentials: Initializes new instance of CloudStorageAccount using Storage account name and key as credentials.
- Boolean value: Specifying whether to use HTTP or HTTPS to connect to the storage services endpoints. ‘True’ to connect using HTTPS, otherwise ‘False’. For this blog we shall provide it as ‘True’.
For clearer picture on steps mentioned above, Refer below image,
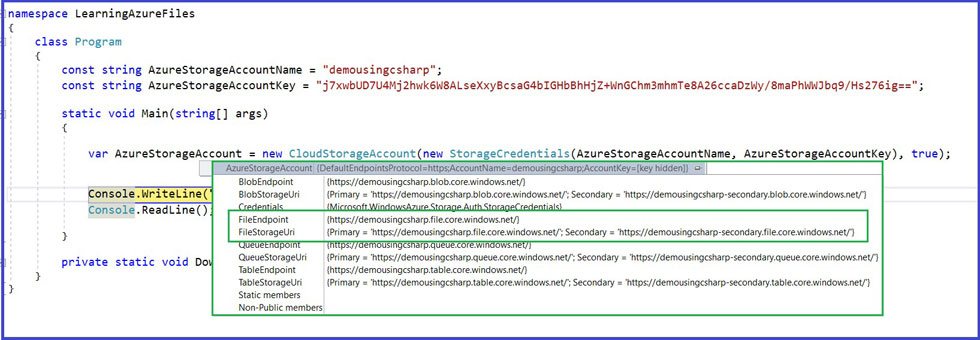
Build the application and Run. > Place a debugger in code. > As highlighted in below image, > Connection with Azure Storage account is created and endpoints details for Storage Files can be seen.
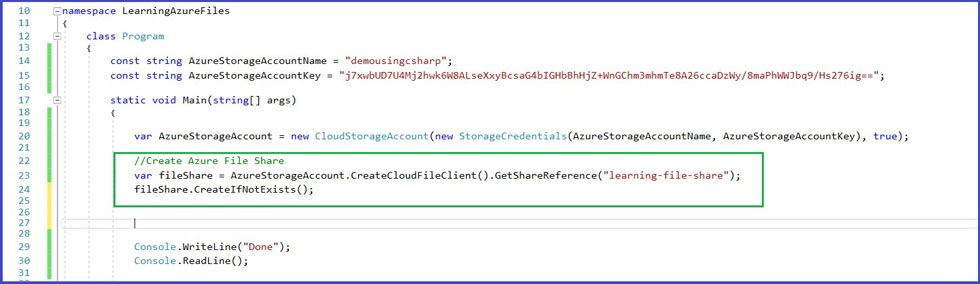
Create Azure File Share
For creating Azure File share, We need to create an Azure File service client using the CloudStorageAccount instance.
- CreateCloudFileClient(): Creates the File service Client.
- GetShareReference(): This gets the reference of File share provided.. It accepts name (filesharename) as parameter. For this blog, we are creating ‘learning-file-share’ file share.
- CreateIfNotExists(): If not already exist, this would create the file share with name provided.
Refer to the below image, for the above-mentioned implementation.
Run the application. Now, open Microsoft Azure portal, Navigate to Storage Account => Overview section. Click on Files, under Services block, as shown in below image. We can see newly created Azure File share naming ‘learning-file-share’ , along with its URL or endpoint to get connected.

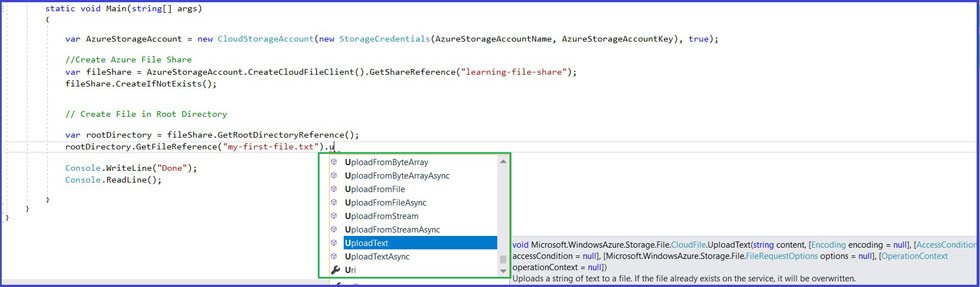
Creating File in Root Directory
For creating a file in the Root directory into our Azure file, we shall use
- GetRootDirectoryReference: Retrieves information of root directory in a given File share.
- GetFileReference: This gets the reference for the File in a given File share. It accepts name (filename) as a parameter. For this blog, we are creating a ‘my-first-file.txt’ file.
- UploadText: Method to upload a string of Text to a file. If the file already exist on the service, it will be overwritten
The below image shows the UploadText method in detail,
Refer to the below image, for the above-mentioned implementation
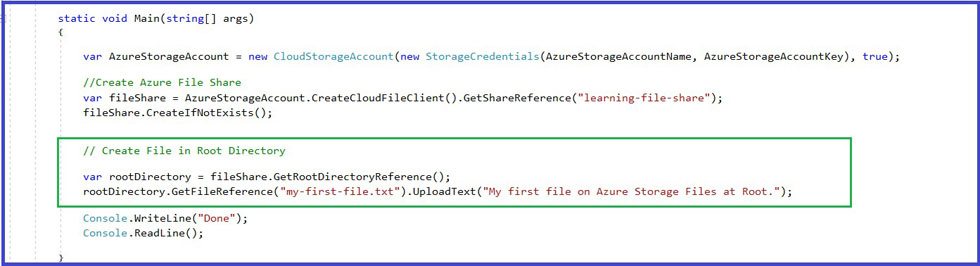
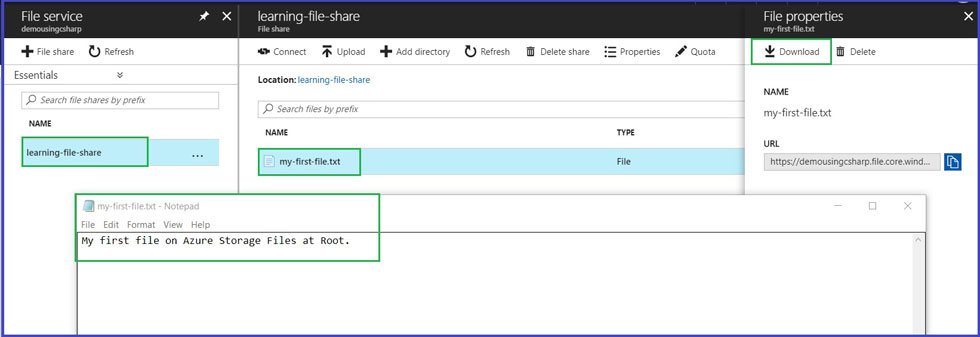
Run the application. > Now, open Microsoft Azure portal, > Navigate to Storage Account => Overview section. > Click on Files => learning-file-share (File share created) > Great! new file is now created.

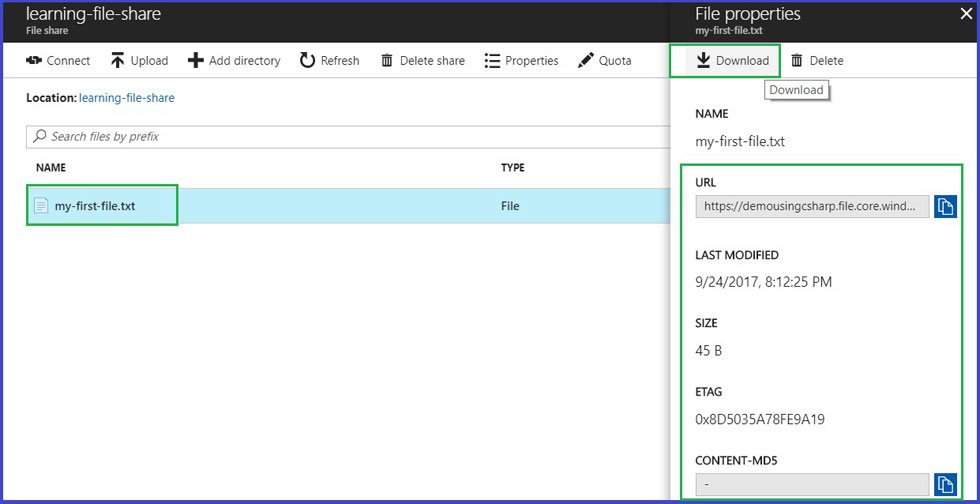
As we have used the UploadText method to upload text string in a newly created file, let open up the file to verify it once. In the portal, Click on File i.e. ‘my-first-file.txt’ Blade with name File properties will appear at the right corner of the portal screen. Details like File name, size, public URL, last modified date, ETAG along with two links,
- Download – To Download respective file.
- Delete – To delete respective file.
Click on Download
Once the file gets downloaded, open the file. We can see the string text we passed in the UploadText method, is part of our file.
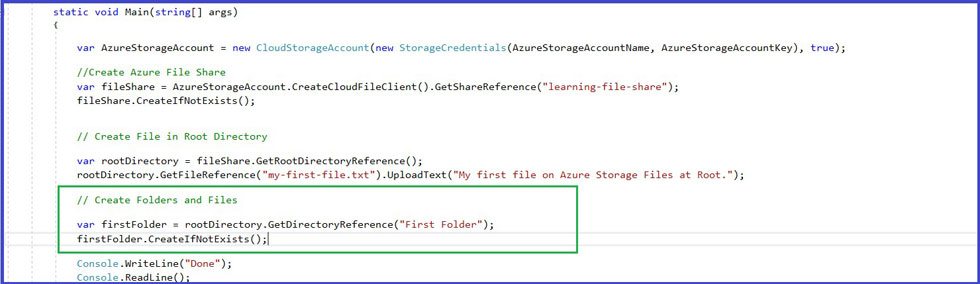
Creating Folders & Files in Root Directory For creating folders & files in the Root directory into our Azure File, we shall use,
- GetDirectoryReference: Creates & retrieves folder information at a given root directory in a given File share.
- CreateIfNotExists(): If not already exist, this would create the folder with name provided.
Refer to the below image, for the above-mentioned implementation.
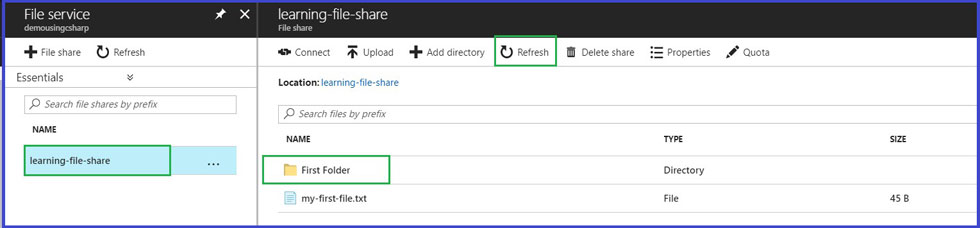
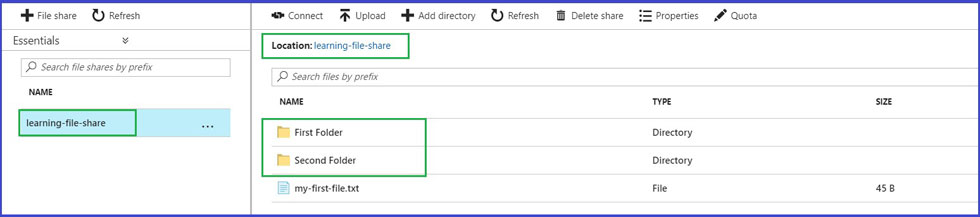
Run the application. > Now, open Microsoft Azure portal, > Navigate to Storage Account => Overview section. > Click on Files => learning-file-share (File share created). > We can see the newly created folder at File share root.
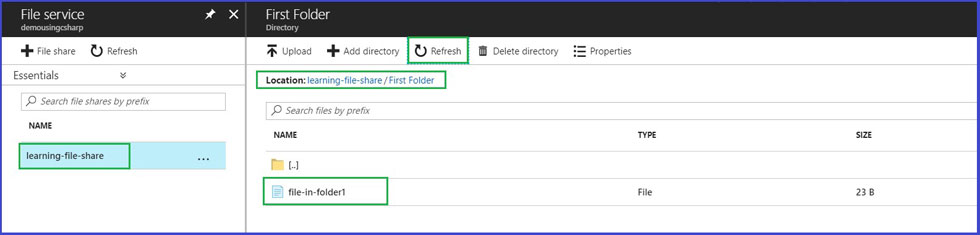
Now, create a file with some text under this given folder. > Repeat above mentioned steps for creating a file. > The only change here would be, now it's not on the root directory but in a folder. > Refer below image for detailed implementation.
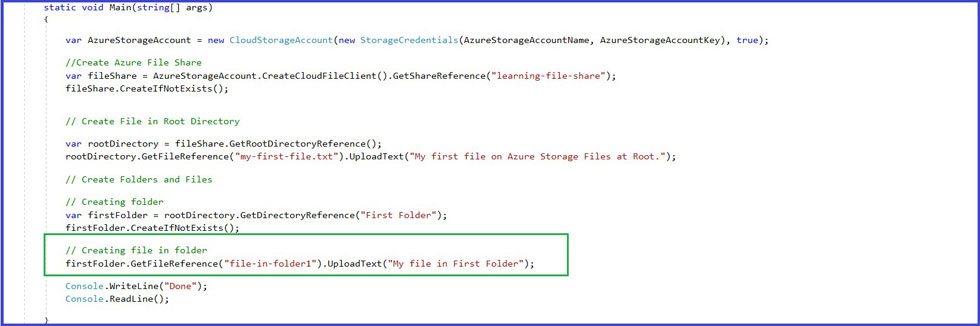
Run the application. > Verify-in Azure portal.
Similarly, we can create multiple files, folders in Azure File share. Let’s repeat the same activity for creating folders & files in the folder. Code Implementation,

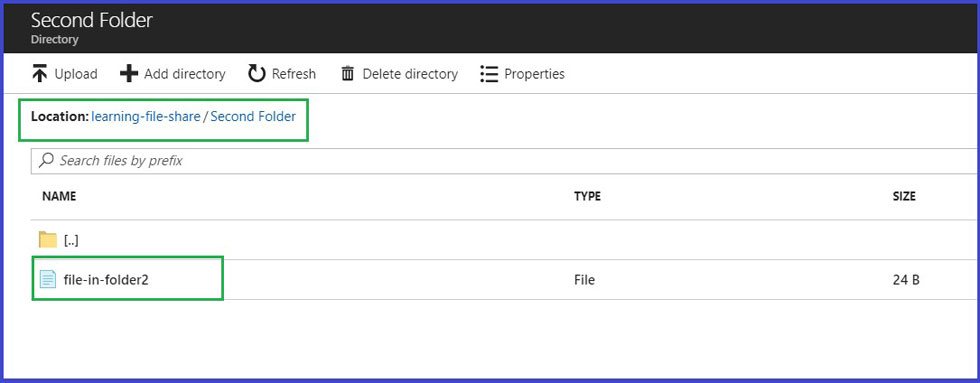
Run application & verify in Azure Portal. Newly created folder.
The newly created file is inside Folder..
Mounting Azure File Share
Azure storage allows mounting of Azure File Share into our Windows & Linux machines.
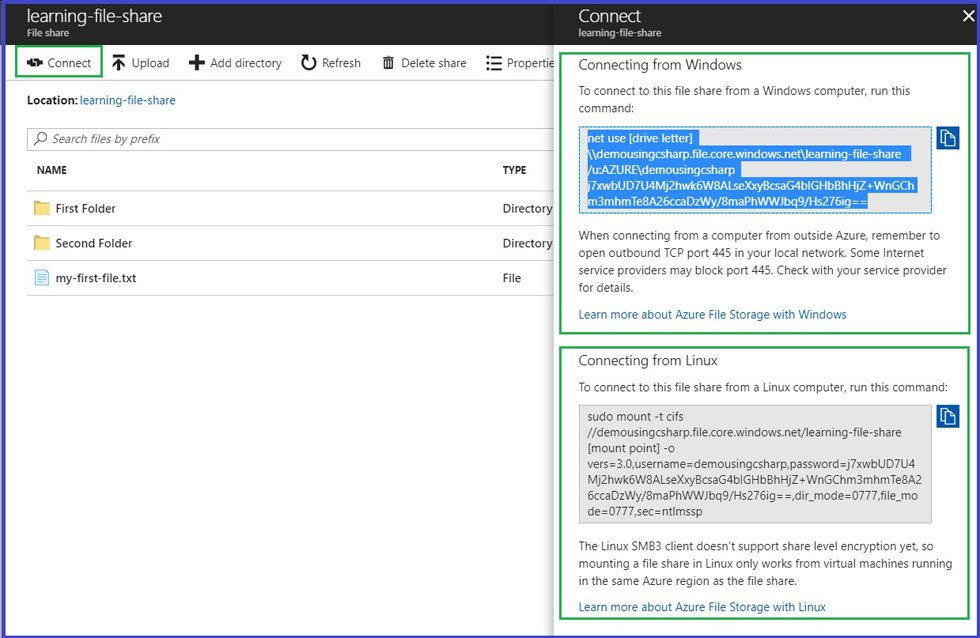
Connecting from Windows
When connecting from a computer from outside Azure, remember to open outbound TCP port 445 in your local network. Some Internet service providers may block port 445. Check with your service provider for details. It gets to connect with running anyone from PowerShell commands & commands. These commands are already provided in the Azure portal. Just copy & Run!
Connecting from Linux
The Linux SMB3 client doesn't support share-level encryption yet, so mounting a file share in Linux only works from virtual machines running in the same Azure region as the file share.
Refer to the below image for the commands.
As an exercise will recommend trying this of your own by reading the links provided. It will help you in understanding the concept in a much better manner.
Downloading File Share contents via programming
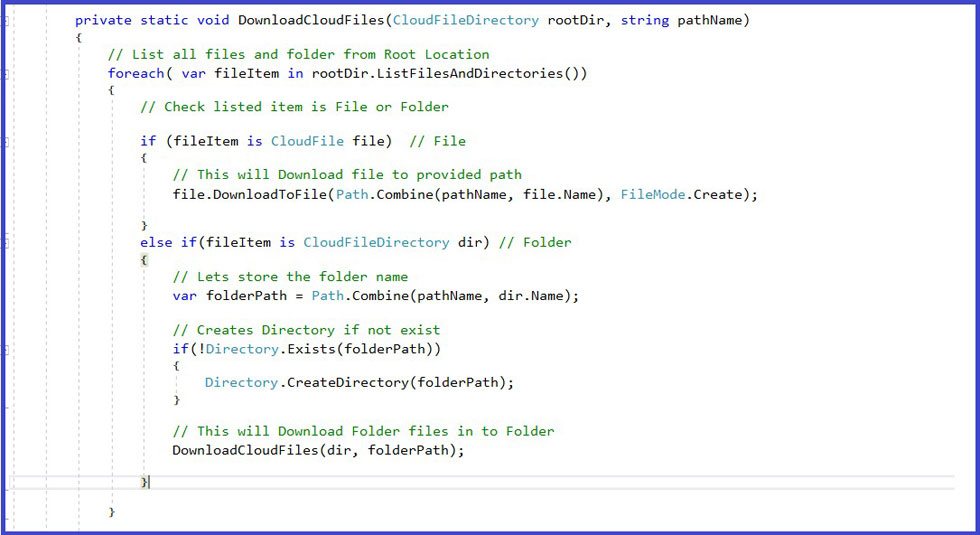
Write a method for downloading all folders & files from File Share. This method accepts the File Share Root directory object & Location of the machine where we need to download this file.
- ListFilesAndDirectories – This will list down all the details of Files & Folders for a given File share.
- CloudFile – If the content in the list from the above method is a file, the item will be associated with the CloudFile family.
- CloudFileDirectory - If the content in list from above method is a folder, item will be associated with CloudFileDirectory family.
Using the above entities, the method will check files & folders from the given Fil Share root directory and accordingly download the files at the provided location. The below image shows the above implementation with step by steps details as comments.
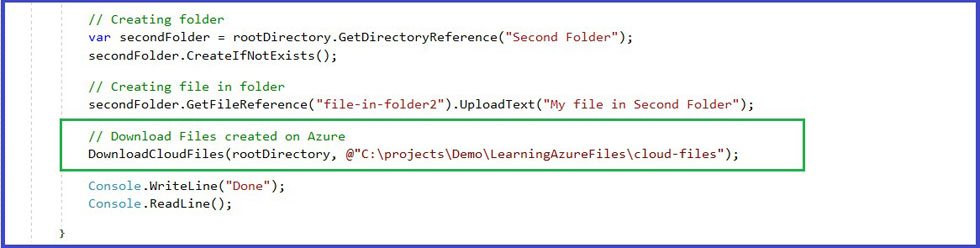
Calling above Method with passing required parameters as mentioned above.
Compile & Run the application. All the above-created files & folders are downloaded at the provided location.
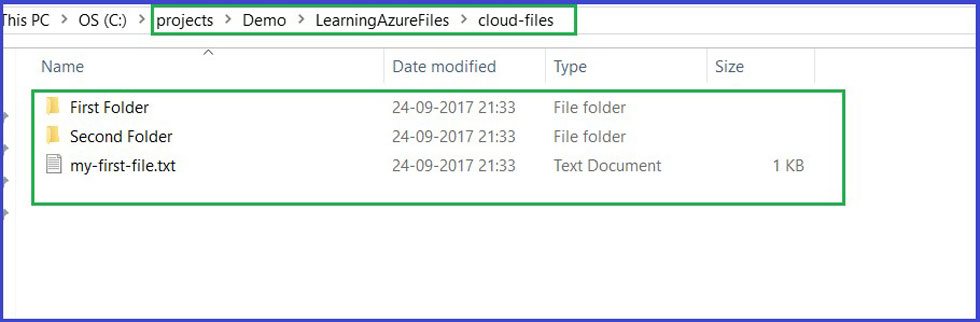
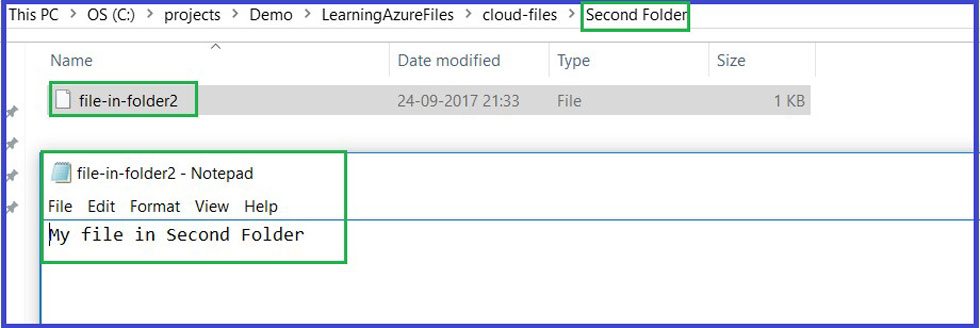
Open the file to verify the content. Great folders, files & content are verified!
In this blog, we learned how to get connect with Azure Storage account, create new Azure Storage File share along with adding folders & files to Azure file share. Also, how to mount & download file share contents all in ASP.NET application using C# as a programming language. Hope this blog will help developers to easily get started with Azure File share using C#. Would recommend trying working with Azure Files, to leverage azure storage power into your application. Chirag Thumar, A 5-years experienced developer in NEX Softsys - Offshore ASP.NET development Company India has vast knowledge about content writing.

Recent Blogs
Categories


