One of the Important features of dynamics 365 is the personalized user workspace with different daily used reports, frequently used data and various transaction details to provide a user-friendly view to improve the efficiency in day-to-day tasks.
Workspace is design/customized as per user requirement and only adds contents often required by the user. It makes dynamics 365 very popular among end-user.
There are various out-of-box workspaces available already for different roles of the organization to be used as per our requirement, and also we can modify them if required.
There is also flexibility to create our workspace if the existing one doesn’t fit the need of the organization. Microsoft dynamics AX company has provided a very easy and convenient way to create a workspace on your own which gives great power to the user.
Steps to create workspace:
Login to Dynamics 365
From the home screen → Right Click → ‘Personalize’
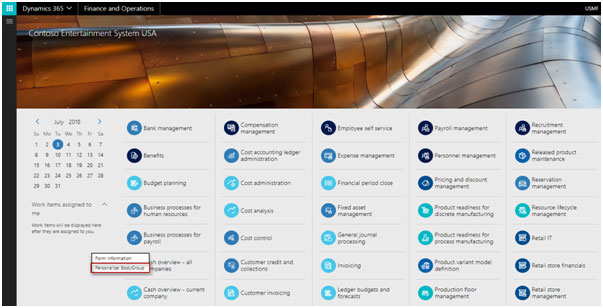
Click on ‘Add a workspace’
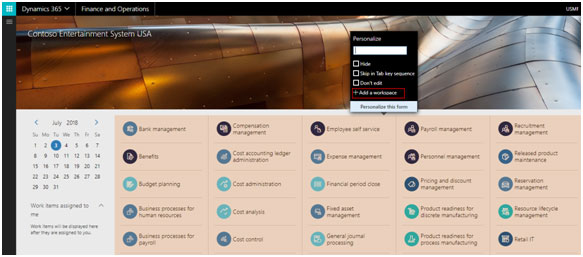
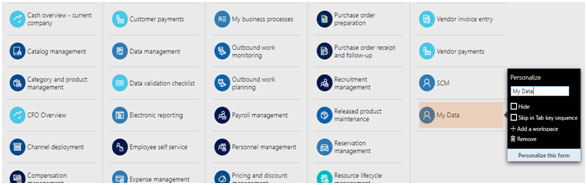
Now right click on the new workspace created → then click on personalize → Rename the workspace
Now is a time to add required data in the workspace so that it will be used easily without any need to navigate in the system which is a time-consuming activity.
Tile
Here as we are creating a workspace for purchasing manager, we will first add a Tile of vendors to the workspace.
Go to Procurement and sourcing → Vendors → All vendors
Go to header menu ‘Options→ in the personalize section, Click on ‘Add to workspace’
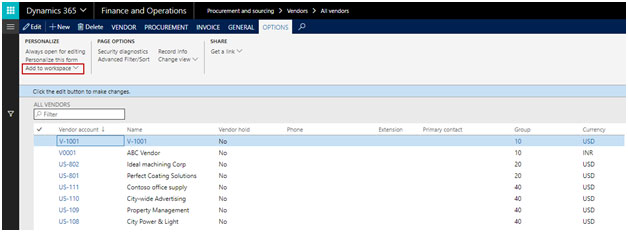
Select the workspace created and selects the presentation style. We have three styles available and those are List, Link and Tile. In this case, we will use Tile to display vendors.
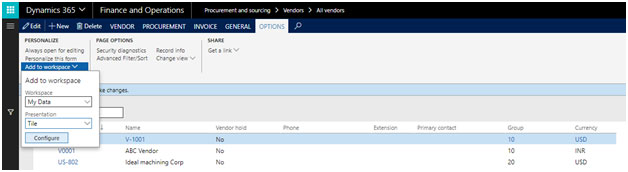
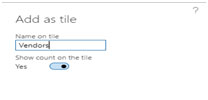
Select the name of the workspace tile and choose whether to display the record count on the tile or not.
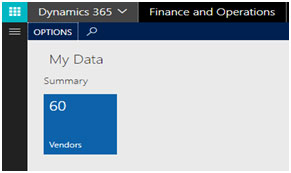
Go back to the workspace → you will see vendor tile along with record count
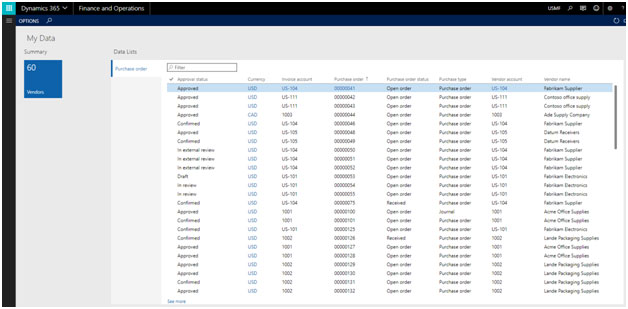
List
Next is to add data in the form of a List in then workspace.
Follow the same steps as mentioned above except select the presentation style as ‘List’
In this case, we will add a list of purchase orders in the workspace.
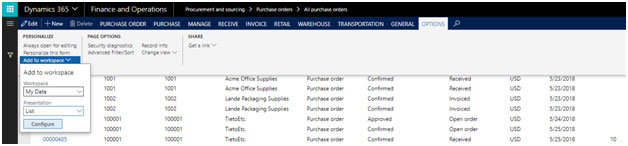
Click on configure to add a list to the workspace.
Select the columns you wish to display in the workspace data list
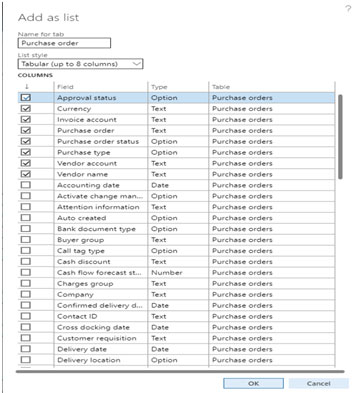
Click ok to add a list to the workspace.
Go to the workspace to view the List.
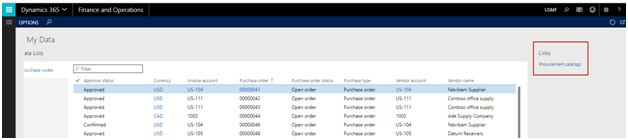
Link
Now next is to add the data in the form of a link in the workspace.
Follow the same steps as mentioned above except select the presentation style as ‘Link’
In this case, we will add a procurement catalog link to the workspace.
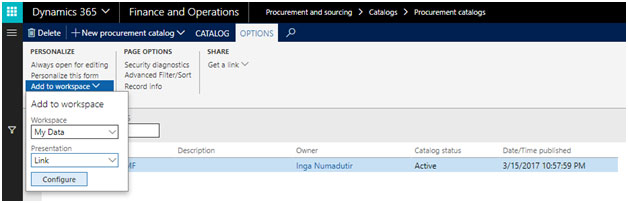
Click on Configure
Add name of the link for the workspace
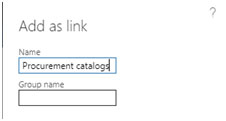
Click ok and the link will be added to
Go to the workspace to check the Link added.
In this way, we can add data to the workspace in the form of Tile, List and Link.
Share the workspace
It is simple to share your personalized workspace with other colleagues or to be used in another environment without any further hassle of creating the workspace.
Simple steps to share the workspace
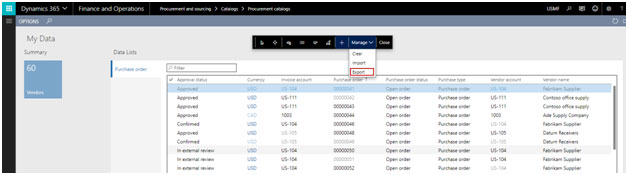
Go to the workspace → Go to the workspace → go to header menu ‘Options’ → click on ‘Personalize this form’
In the personalize menu, select Manage → click on Export
System will ask for the path to save the exported file or go to download folder to locate the file. This file will be in .XML format with the name ‘User_MyWorkspaceXXX.xml’

We can share this file which then can be imported to be used in some other environment or can be used by other colleagues
To import the workspace, right click on the workspace area → click on ‘personalize this form’
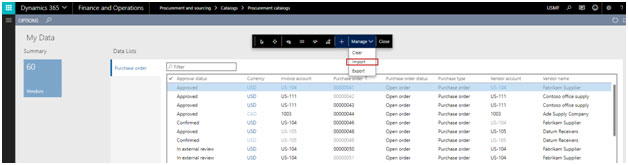
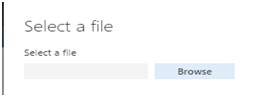
Browse the file which was shared to be imported into the system.
Close and reopen Dynamics 365 to view the imported workspace.
In this way, we can share the workspace easily.
BI Reports
We can also add business intelligence reports in the workspace to provide real-time operational insights.
Follow the below steps to add BI reports to your personalize workspace:
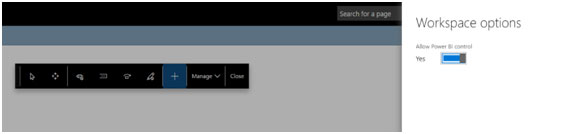
Go to the workspace → go to header menu ‘Options’ → click on ‘Personalize this form’
Select the “+” symbol to add a personalization to your workspace
on the right, move the selection to “yes” on the “Allow Power BI control” field
Click the “Get Started” button. You will then be prompted for credentials to connect to your power BI account
Select the reports you wish to add in the workspace → Click ok
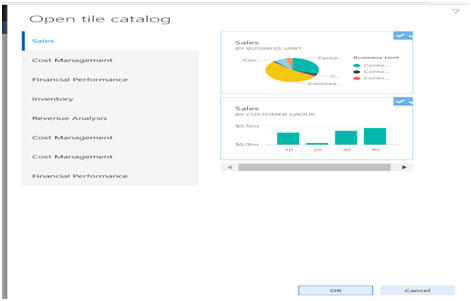
Reports will be added in your workspace
Final Thought
Workspace is a very powerful tool that can be used to design your space in dynamics 365 to get all the data in one place and in the style you want.


