Automated Unit Tests:
This is a way of testing the application code written by a developer to develop any application. Unit tests are an integral part of Software application development life cycle. They might be some extra time consuming, but they do provide some special benefits when you have to scale your application as per the client needs.
NUnit:
It is a framework library that simplifies the process of writing unit test to test application code. It is the most popular framework out in market and is the oldest one with a lot of features. It is an open source project and now a part of .net foundation.
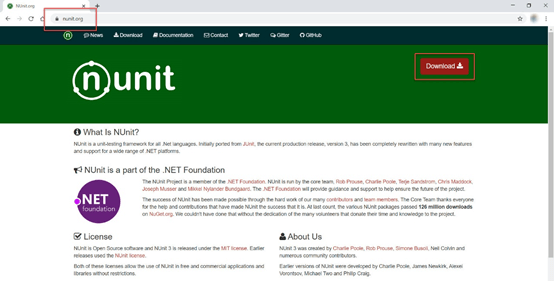
You can browse their official website for documentation purpose and most of their document is publicly available on github repo.

Agenda:
In this article, we will developed a .net core application with nunit template provided as a part of .net core by Microsoft. We will install the required libraries or update the existing ones that are provided as a part of template. Later we will learn how to write unit tests and run them in the Test Explorer window of Visual Studio.
Creating the application:
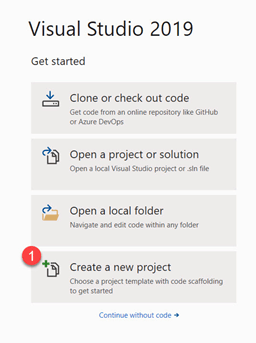
Step 1: Start Visual studio and create a new project.
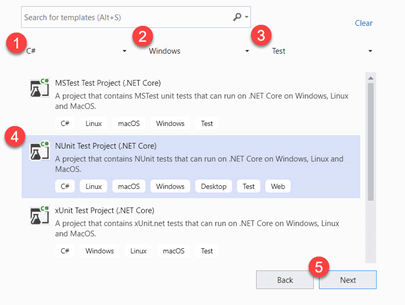
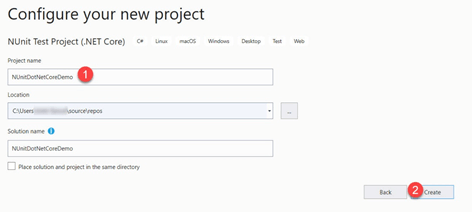
Step 2: From the project templates, select NUnit Test project template for .net core as shown below.
Step 3: Provide a meaningful name to the project and hit create button.
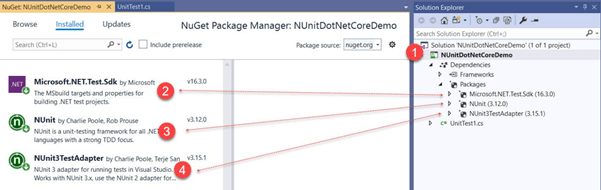
Step 4: Once the project is created, go the nuget packages library by right clicking on project name and select manage nuget packages option. Make sure the below mentioned packages are installed with the latest version. If not, install them or upgrade as per availability.
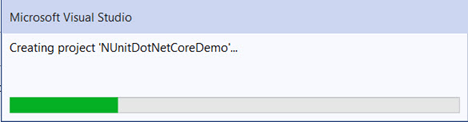
Step 5: Now we are done with project creation and packages installation. Let’s start writing the Unit Test cases.
Go to UnitTest1.cs file and replace the code with the code below.
Explanation:
TestFixture: This attribute makes a class testable and tells the test runner to consider this class as a Unit Testing class.
Setup method: NUnit has a setup method that is called each time a unit test is executed. So, it works like a single place where you can define that objects that are required in each unit test.
Unit tests should not return anything so each unit test should be of void return type.
Each unit test method should be decorated with Test attribute which tells the test runner that during unit test execution it has to process that unit test method. If a method is not decorated with Test attribute, then that method will be considered as a test method.
Unit Test works on the principle of AAA (Arrange, Act, Assert)
A. Arrange: This part should arrange the object that are required to create the unit test. This includes object creation, or mock data creation.
B. Act: This part includes the actual calling of business logic that you want to test. This part returns a result which is needed for verification of correct data.
C. Assert: This is the final part and at this part NUnit plays an important role. Other frameworks like MS Test, they do provide the same feature to verify that the result is correct or not, but its hard to remember.
If you look the code sample that we have used, it contains Assert Statements which are easily understood as they feel like plain English. So, developer does not have to remember any syntaxes to write unit tests which eventually increases developer’s productivity.
Ignore Attribute: For example, you have a large application having a lot of features. Now, you client wants you to remove one of the features out of all. So, in ideal case you will either delete the code of the particular feature or comment it out for future needs. And the same you have to do with corresponding unit tests which is a bad practice. Instead, we can decorate the class or method with Ignore attribute and while running unit test cases, test compiler will ignore those tests.
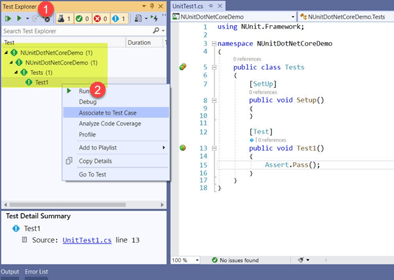
To run the unit tests, open Test explorer window and click on green icon on the top as shown below.
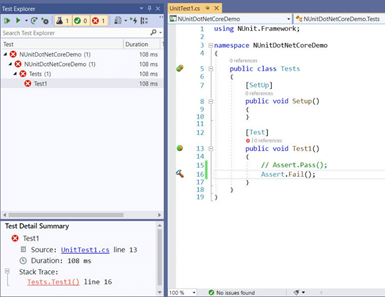
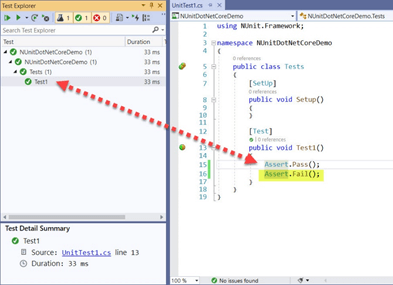
Below is the final output, when you run all unit tests in one go.

Recent Blogs
Categories


