In this blog, we are going to see how to write a webhook in python for Dialogflow a platform for building chatbots.
A webhook is nothing but a file whose logic is written for chatbots.
As in my previous blog also I have given you a brief overview of Dialogflow. The focus area of this blog is webhook.
You could find out many resources on how to write a webhook in Python but I feel that there is a lack of connectors between the available blogs. Hence, here I will try to make this blog very useful who is looking to build chatbots using Dialogflow.
What is a webhook?
In Dialogflow, it will provide you the interface for creating the intents, entities with its pre-built machine learning intelligence.
But after creating an intent there will be a response associated with every intent to continue the conversation. Sometimes it happens that, you don’t want a static response or question for the user, it could be fetching the information from some API and asking the user to confirm on it or it could be calculating the years based on start date i.e., any kind of logic which requires some kind of software outsourcing services, this is the point where webhook/fulfillment comes into the picture.
Fulfillment: It has some function as webhook, but the only difference is it is linked up with Firebase directly and you can also use the inline editor provided by the Dialogflow itself. For short programs fulfillment is good but for major chatbots go for webhook.
Cloud functions on GCP
GCP stands for Google Cloud Platform it is a cloud platform built by Google which has so many functionalities available like Data Storages, Cloud functions(to store your program files), App Engine(Deploy your App), etc.
Questions are:
How Cloud functions and webhook are connected?
So, Dialogflow just gives a UI where we can embed the link of webhook but that webhook needs to be deployed somewhere. You can use any other servers to deploy your webhook like Heroku, or AWS cloud platform, etc.
If you want to look at how to deploy python code using Heroku, go to -: Link of Heroku blog
As Heroku is a free hosting service, it will delay your response sometimes. So here we will host our webhook on Cloud Functions.
How to enable webhook and deploy them from a local machine?
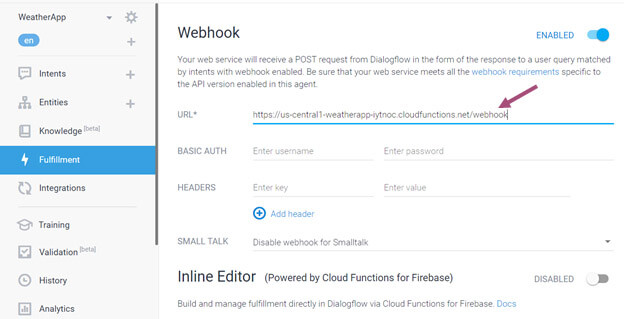
So, in the web interface of Dialogflow, if you will go to the fulfillment tab then enable webhook and along with the URL, in the end, will be displayed a by default webhook name. You can replace the name of webhook according to your need, I kept it webhook (highlighted with an arrow in the above image).
Now, you have the whole URL.
How to deploy cloud functions on GCP?
Part 1: Setup Google Cloud SDK
Here are the following steps to setup a function which can be deployed from local machine to cloud functions -:
Step 1: Create a gcp account
Make a gcp account from which you have created a Dialogflow account.
Step 2: Make a folder which contains python files or whatever files you want to use
After creating a folder that contains files, as these files are available locally but we want to deploy to some cloud service.
We have to setup google cloud sdk first and then initialize the gcloud sdk i.e, selecting the project and then deploy the local files to a cloud function.
You can create multiple webhooks.For Dialogflow handling the conversation, we have to deploy a single webhook.
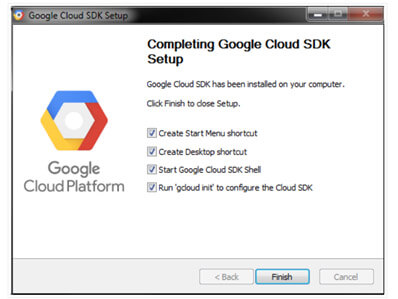
Setup google cloud sdk
We need to setup a google cloud sdk i.e, needs to install using an .exe
Step 1: Download the google cloud sdk installer.
Step 2: Install using the .exe file
Step 3: For deploying anything on GCP, you need to initialize the gcloud
In initializing the gcloud what you have to do -:
- Select the project on which you want to perform specific operations like deploying to cloud functions, using storage options like BigQuery, Firestore, etc. (You can see all these operations in the interface of google cloud. You can check the login to gcp in a browser using https://cloud.google.com/ and please choose the appropriate id in the top right corner)
ALSO READ
Let’s see some demo -:
After installing the sdk for Google cloud, we need to initialize the Google cloud (i.e, a project on which we want to work with a local machine).
Step 1: Open up a command prompt and type command -: ‘gcloud init’
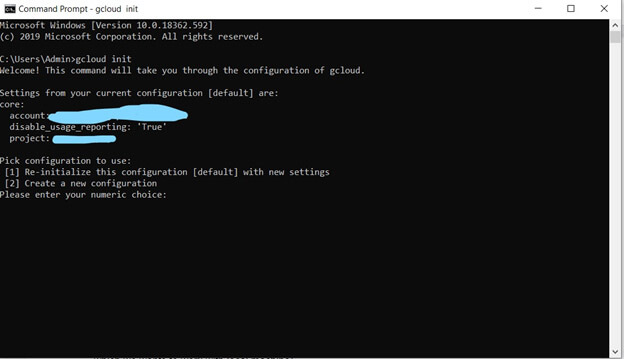
As you can see if you don’t have any configuration you need to select 2, otherwise 1.
As I already set it up, I have to choose 1 but in your case, you have to choose 2 and it will ask details like email id, etc.
Now we need to choose the project on which we want to work.
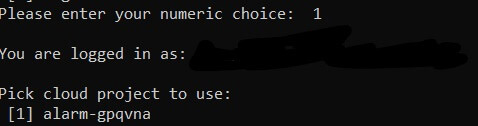
If you have many projects it will come up and you have to select the project number in which you want to work.
Finally, it will be setup.
Part 2: Deploy Webhook has written in Python to Cloud functions
As we have already seen how to initialize Google cloud and now wants to write a webhook in Python development services.
Sometimes it may come in mind that we need to create different webhooks for different functions for a chatbot. But it is not the case there is only one webhook that contains the main file to execute all functions let’s see how.
Step 1: Create a folder which will be deployed to CF (Cloud functions)
Let’s say I have created a file main.py in that folder -:
Step 2: Creating a requirements.txt file to let the CF know which the required dependencies are.
Requirements.txt -:
You can add on the functions in main.py and libraries in the requirements.txt file according to t your need. You can also deploy other files by creating other files like excel sheet etc in the same folder.
Step 3: Deploying the created webhook to CF
Open the command prompt to the specified path where your webhook folder is located
And it will be deployed to your cloud functions in GCP.
Now, if you will go to https://cloud.google.com/ and go to cloud functions (https://console.cloud.google.com/functions/) then you see the created functions like webhook etc. there you can check logs and other details for your functions.
As we have created and also used the link in Dialogflow for Chatbot.
If you will test your chatbot then it will use this webhook to return a response.
Conclusion
We have seen how to use Cloud functions and how to deploy webhook of Python to CF. Cloud function supports different languages like Nodejs, C#, etc. You can choose the environment whatever you like.


