Q. What is Socket communication?
A protocol to send bi-directional messages (data) from one point to another, unlike the traditional communication protocols like REST, socket communication works by establishing a channel where the publisher can publish to that channel and receivers can listen to that channel. In other words, it’s a way of publishing subscribing method.
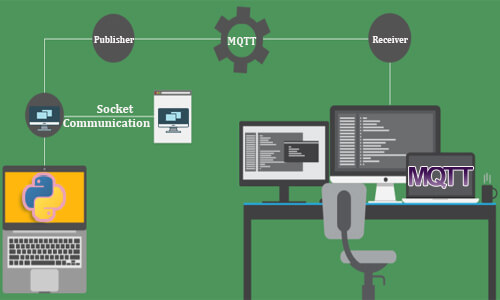
Q. What is MQTT?
MQTT (Message Queuing Telemetry Transport) is a very lightweight publish-subscribe protocol that enables us to build systems capable of publishing (server) and receiving messages (client).
Let’s go with an example: Assume users A, B and C is listening to a channel updates/and lets an X publishes a message New Update: Please update your application to 2.2on to updates/ channel, the user A, B, and C would immediately get to see the message.
Q. Can you mention some use cases for the above?
Below are some common use cases:
- When you want to handle IOT data on server side; say location data.
- When you want to notify the user’s browser of some update.
- When you want to notify the certain OS users of anything.
Q. Is MQTT a widely known standard of communication?
MQTT being a lightweight protocol sits aside your existing server-side and brings you to a lot of capabilities of pub-sub service.
Dive Deep with a Use Case:
Let’s think of a scenario where you are building a fleet (say Cab) tracking application where the location is updated from a mobile application every 5 seconds (say). And you have a dashboard on a web application to show these cabs. What would you think about designing it?
The initial call would be to have a REST API to trigger the location update from the Android every 5 seconds to the server? Good catch. But this is not something scalable or reliable going forward. Think of the number of HTTP requests hitting the server along with the load handling capability of the server.
Consider the dashboard also makes API calls for those cars for each user seeing the dashboard. You wouldn’t be happier with that figure and that’s why MQTT comes to the rescue.
So, if we were to use MQTT how would we design the solution for the above problem? Let’s say each of the cabs are having a channel of format location/ and every second these apps will publish the location on their channel; if there is a server listening to the channel with a pattern location/*, these updates would be received at the server-side. Sounds pretty cool?
A question to ask yourself. How would you track an individual cab’s location instead of all cars? Well, the answer is to change the listening channel to location/.
How to setup MQTT service using Python:
Requirements:
- Any MQTT Broker (like HiveMQ, redis, RabbitMQ)
- Python 2.7 or above (Python3 recommended)
- pip (pip3 for python3)
- paho-mqtt (>=1.5.0)
Implementation:
1. Assuming python3 is installed, install paho-mqtt with the below command
2. Let’s set up a client (say mqtt_client.py) that listens to a messaging channel ` location/123`:
- a. Now, let’s import the mqtt client from above library.
- b. Let’s setup the broker configuration
So, what is a broker here? You could imagine a broker as a postman who is responsible for delivering one message to another. There are plenty of brokers to choose from; out of which Mosquitto, HiveMQ, Redis, and RabbitMQ are very commonly used.
Let’s take a look at the above parameters:
Note: For learning purposes, I highly encourage you to begin with a Public broker like HiveMQ (or Mosquitto) as they have a public broker available.
c. Let’s define some required methods:
Let’s discuss on above methods; `on_connect` is a callback method that is triggered whenever a connection is established. Having a value of 0 for `rc` implies a successful connection.
- d. Set the client to listen to the above channel:
And you are ready!! By now, you have a MQTT listener listening to channel ` location/123` of broker 'broker.hivemq.com'.
Let’s keep the terminal window open.
3. Now let’s setup a MQTT server (say mqtt_server.py) that publishes to the messaging channel ` location/123`
a. Like before; we start by importing the paho client.
b. Let’s setup the broker configuration
c. Let’s create a mqtt client to publish the data to the `location/123` channel.
d. Now that the client is ready; let’s publish the data:
As soon as the above line is triggered, you will see the message "Bengaluru, India" will be received in the previous terminal window that was kept open earlier
e. Disconnect when you are done.
Complete code below (using Public Eclipse Broker):
mqtt_client.py
mqtt_server.py
By now, I assume you know how to set up an MQTT layer on top of existing Python app development services, and thereby advancing you one step towards building highly scalable and reliable applications.
Extra configurations:
1. For ease of understanding, a public broker was used here. You can also use any broker (self-hosted or cloud service) to spin up this MQTT service.
2. In a production environment, you would have to use authentication to ensure the security of the messages shared over the channel. This is easily achievable by calling the “username_pw_set” method on the client. For example:
3. In a production environment, you would have to use “` client.loop_start()“` which creates a background thread to run the loop and thus keeps the connection alive (non-blocking way) whereas “` client.loop_forever()“` blocks the loop and waits for the `disconnect` method to be called in order to disconnect.


