These days, in this modern era of Cloud Technology, most clients desperately desire to sync up their Dynamics CRM data with their Azure Cloud storage. This blog shows you how we can copy and synchronize the Microsoft Dynamics 365 CRM database with the MS Azure SQL database using Dynamics 365 Data Export Service.
Pre-Requisites
- A valid Dynamics-365 CRM Instance
- An MS Azure Subscription for Azure SQL Database (For more information - https://azure.microsoft.com/en-in/services/sql-database/).
- Azure Key-Vault (For more information - https://azure.microsoft.com/en-in/services/key-vault/).
Steps with Screenshots:
Login in MS Dynamics CRM instance.
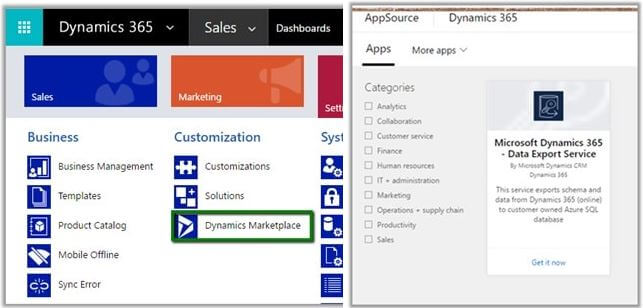
Go to Settings → Dynamics Marketplace and search for Dynamics 365 Export Service.
Note: Data Export Service is an add-on that allows replicating Microsoft Dynamics 365 CE Online Data to Azure SQL Database.
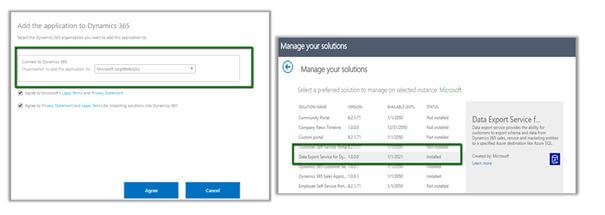
Choose your Organization and install. Wait for a few minutes till the solution gets the whole installed.
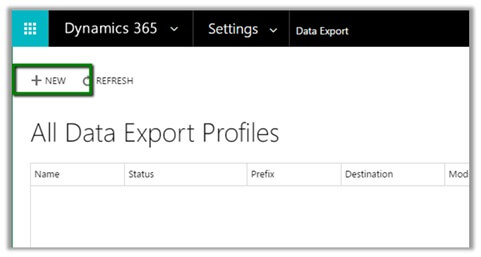
Once the solution is installed, go to Settings → Data Export. (Pop-up window will open a page for Data Export Authentication, so we need to enable the pop-up https://discovery.crmreplication.azure.net/). Click on New to create a new Data Export File.
We need the Azure Key Vault URL here, which securely stores the database connection string.
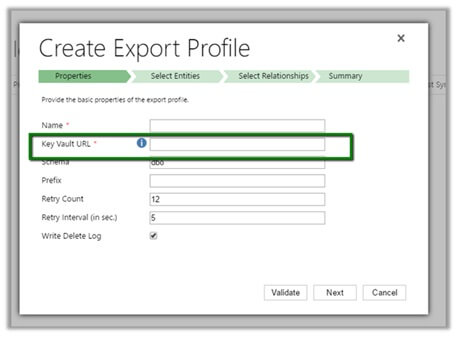
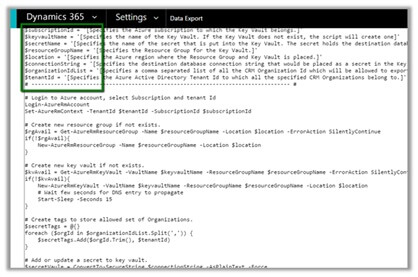
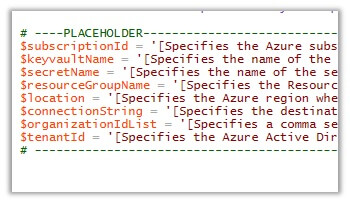
When we click on the info icon, a dialog box with the PowerShell script pops up. It requires the values of our Subscription Id, Key-vault Name, Secret Key, Resource Group Name, Location, Connection String, Organization ID List and Tenant ID.
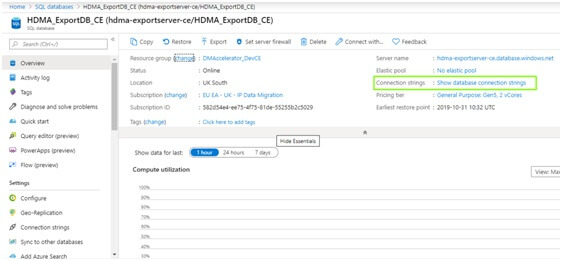
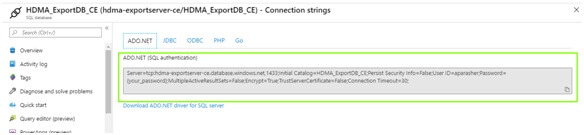
Now login to your Azure Account from portal.azure.com; create a new Azure SQL DB. Please refer to the below screenshot where we have created a Database HDMA_ExportDB_CE. Note down the connection string.
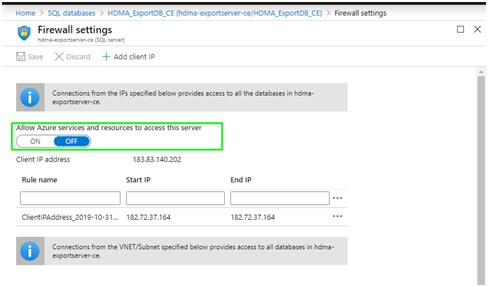
Go to the Firewall Settings and turn off the Firewall.
To get the Tenant ID of your Dynamics CRM instance, go to Settings → Customizations → Developer Resources.
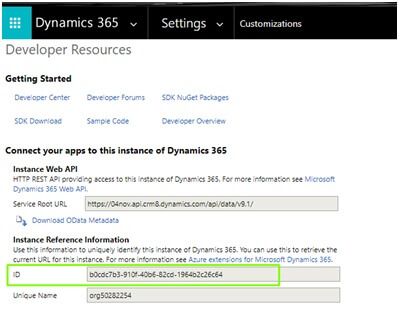
Not down all the following values and put them in our PowerShell script.
PowerShell Command
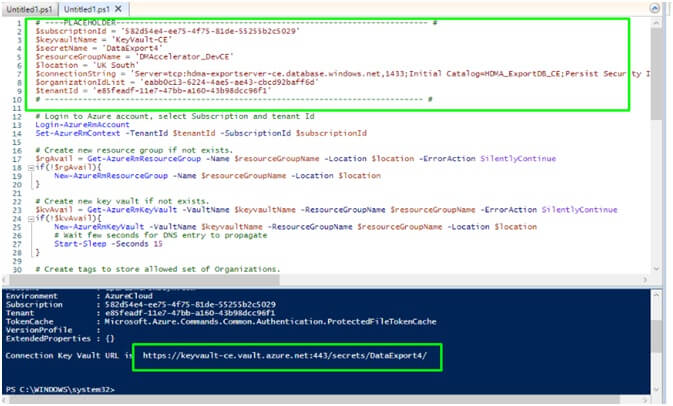
In the PowerShell, run the following commands:
- Install-Module AzureRM
- Import-Module AzureRM
Then run the Script. Once it succeeds, copy the generated URL.
Go to your Azure Key-Vault and check if the newly created Secret appears. Copy the URL in that Secret.
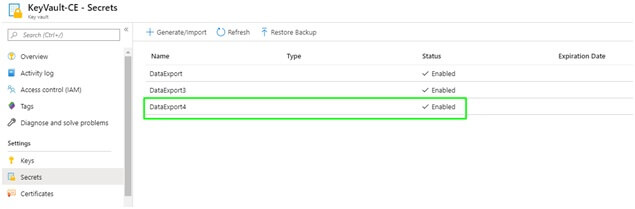
Open the newly created Key-Vault Secret and note down the Secret Identifier, as shown in the screenshot below.

Move back to your Dynamics CRM environment, and open the Export Profile Wizard. Paste the Key Vault URL that we copied above.
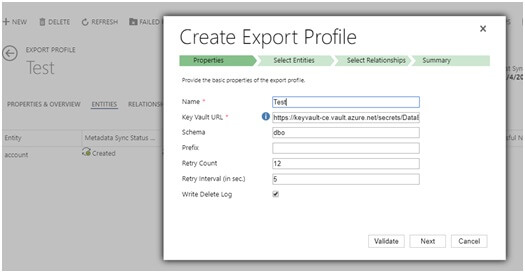
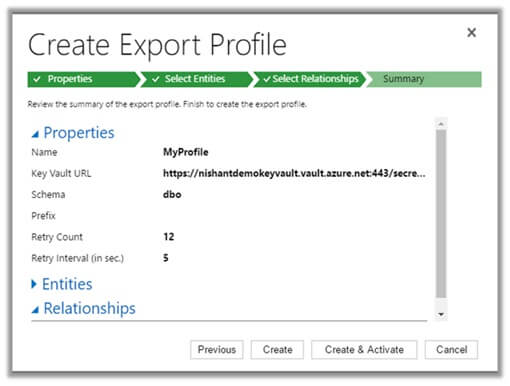
Validate the Profile, select entity/entities, and Create and Activate.

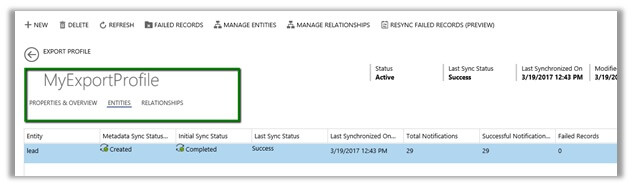
Wait for some time till the Sync-up finishes.
Unit-Testing:
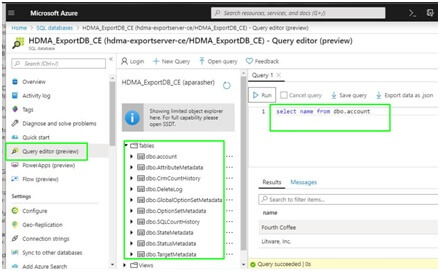
- Move to your Azure SQL Database.
- Run a simple SQL query, for example – SELECT name FROM dbo.Account;
- See the Results section.
Conclusion:
In this tutorial, we have discussed how to integrate Dynamics CRM database with Azure SQL database from our extensive experience as a Microsoft Dynamics Company India. Now whatever change (Creation/Deletion/Modification) is made in the records collection of the entity selected in the Data Export Profile in CRM, the same would be reflected in the Azure SQL Database. An Azure DB Administrator can monitor all these changes from the Azure Portal.

Recent Blogs
Categories


